Collecting accurate, high-quality coral reef data is simple and efficient with MERMAID Collect. Whether you're online or working offline in the field, you can enter observations directly into the platform—no spreadsheets needed.
Data collection begins in your project’s Collecting page. This is your personal workspace where you can enter, view, and edit data from your dive sheets. Species names are searchable with just a few keystrokes, and real-time metrics—such as benthic cover, fish biomass, bleaching severity, and habitat complexity—are automatically calculated as you go, even offline.
Before submission, MERMAID runs built-in validation checks to flag missing or inconsistent values, helping you avoid common data entry errors. Once validated and submitted, your data is ready for analysis and sharing.
Review key terms here used in the data collection before starting.
Start collecting observations
See the step-by-step guide below on how to collect data in your Collecting page.

Step 1: Add a new sample unit
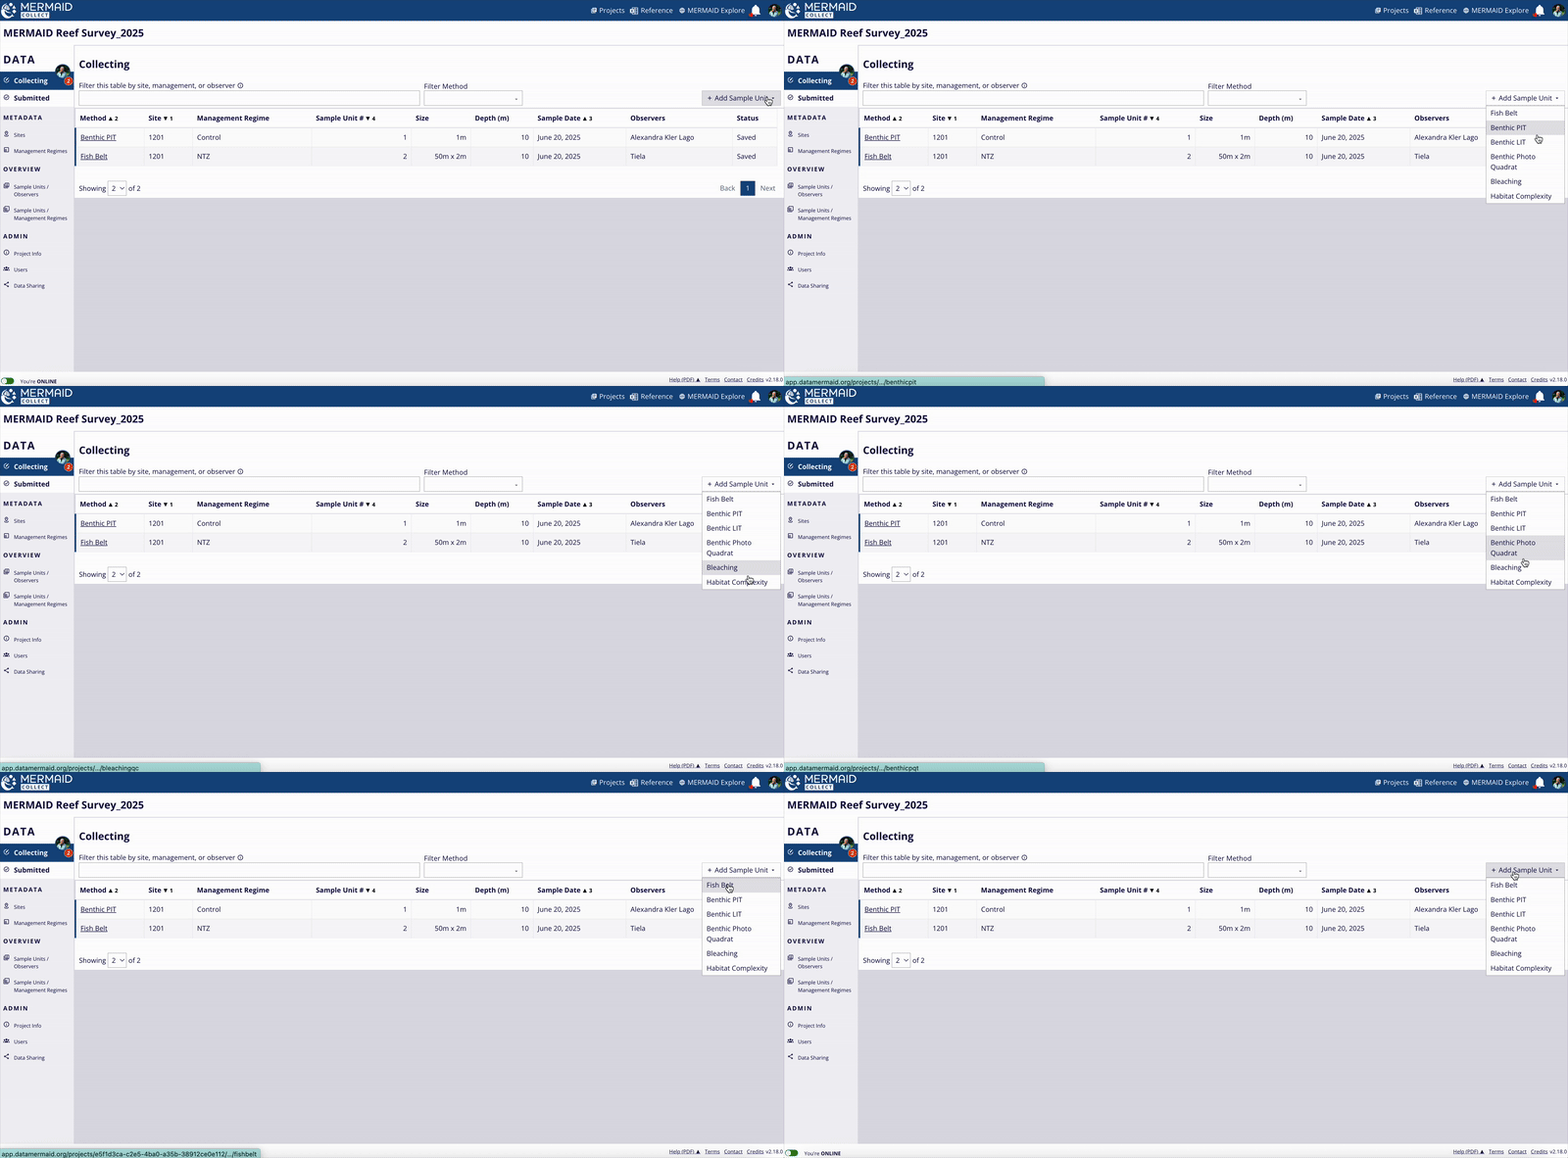
A sample unit is the equivalent of a transect or a quadrat collection on a specific date and site. To record new data, add a sample unit by choosing the appropriate survey method. MERMAID supports six commonly used methods (Read more in Supported Survey Methods), each with tailored data entry forms:
Fish belt transect
Benthic point-intercept transect (PIT)
Benthic line-intercept transect (LIT)
Benthic photo quadrat with manual entry or using the AI image classification (beta).
Bleaching rapid assessment
Habitat complexity visual scoring
You can classify benthic photo quadrats directly in MERMAID using the AI image classification model (beta). Read more about it here.

Step 2: Complete your sample unit form
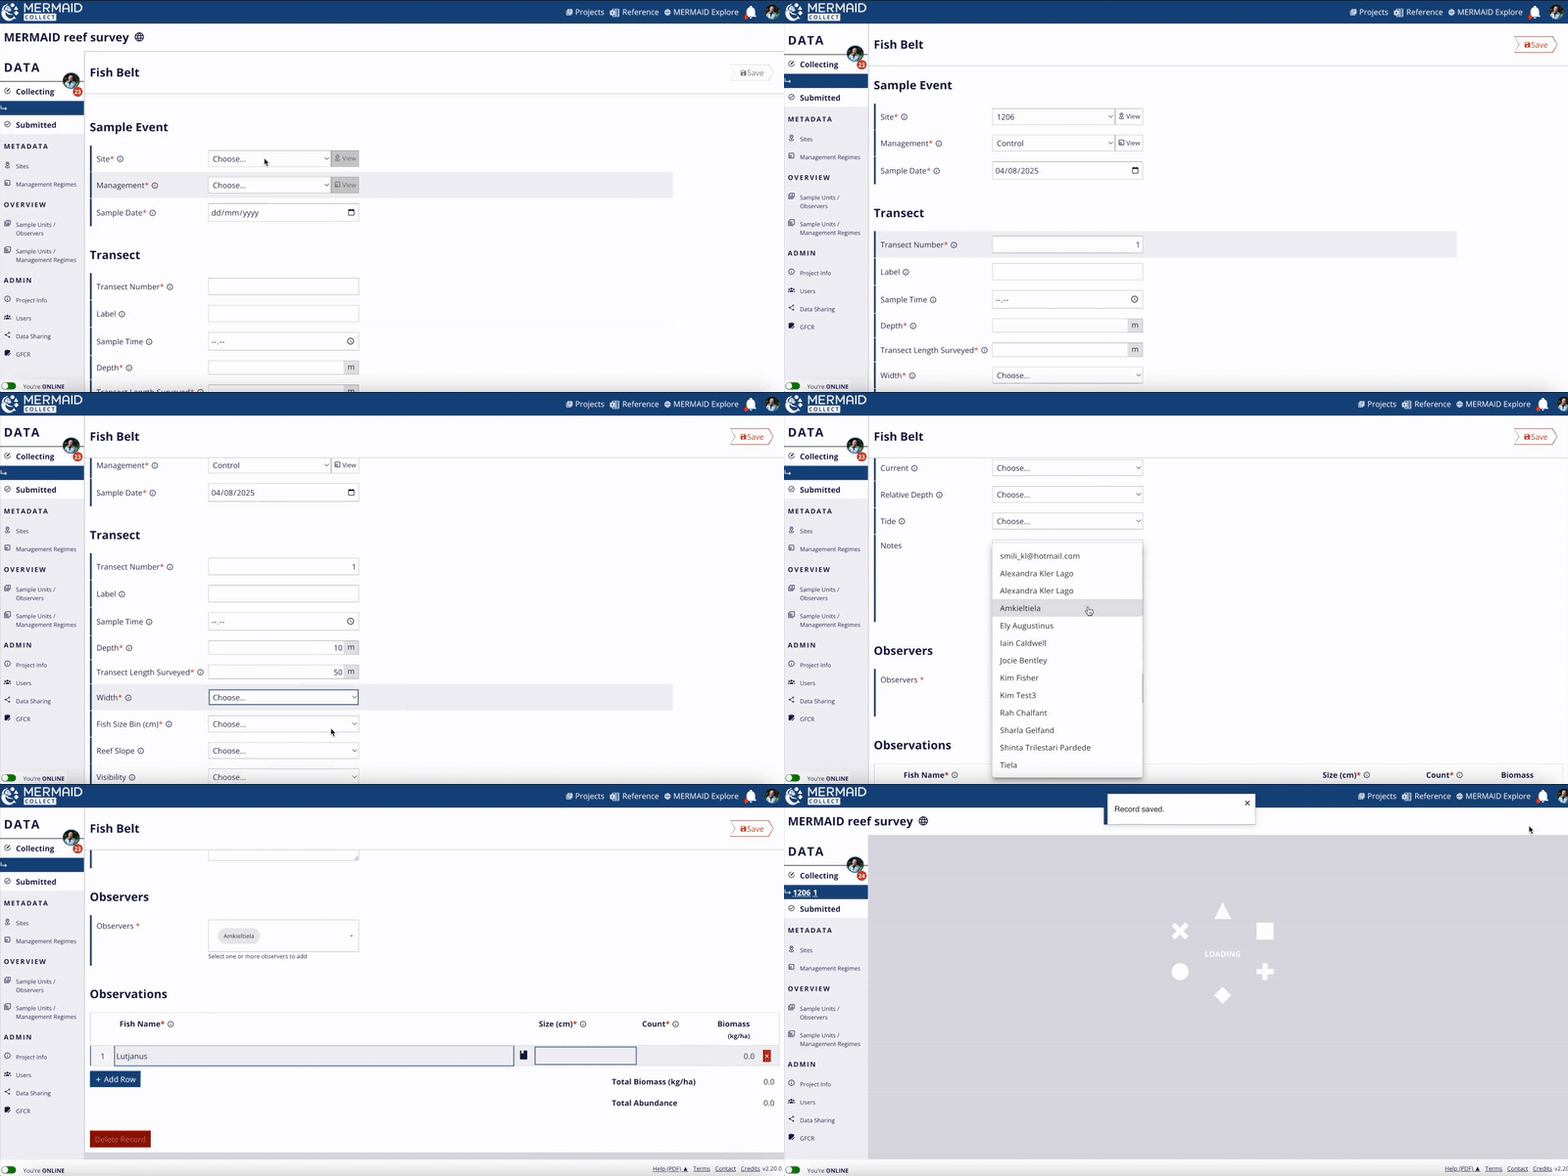
Fill in the required fields and add your observations in the form for the selected survey method. You can save your progress anytime—even offline.
Complete all required fields (marked with a red asterisk) in the sections Sample event and Transect/Quadrat collection.
Select at least one Observer from the list of project users. Click their name to assign; click again to remove. You can select more than one observer if needed.
Enter all observations in the Observations table.
Click Save to store the sample unit—this works both online and offline. If the Save button is greyed out, no changes have been made since the last save.

Step 3: Validate and submit your sample unit
When you are online and ready to share your data with your project members:
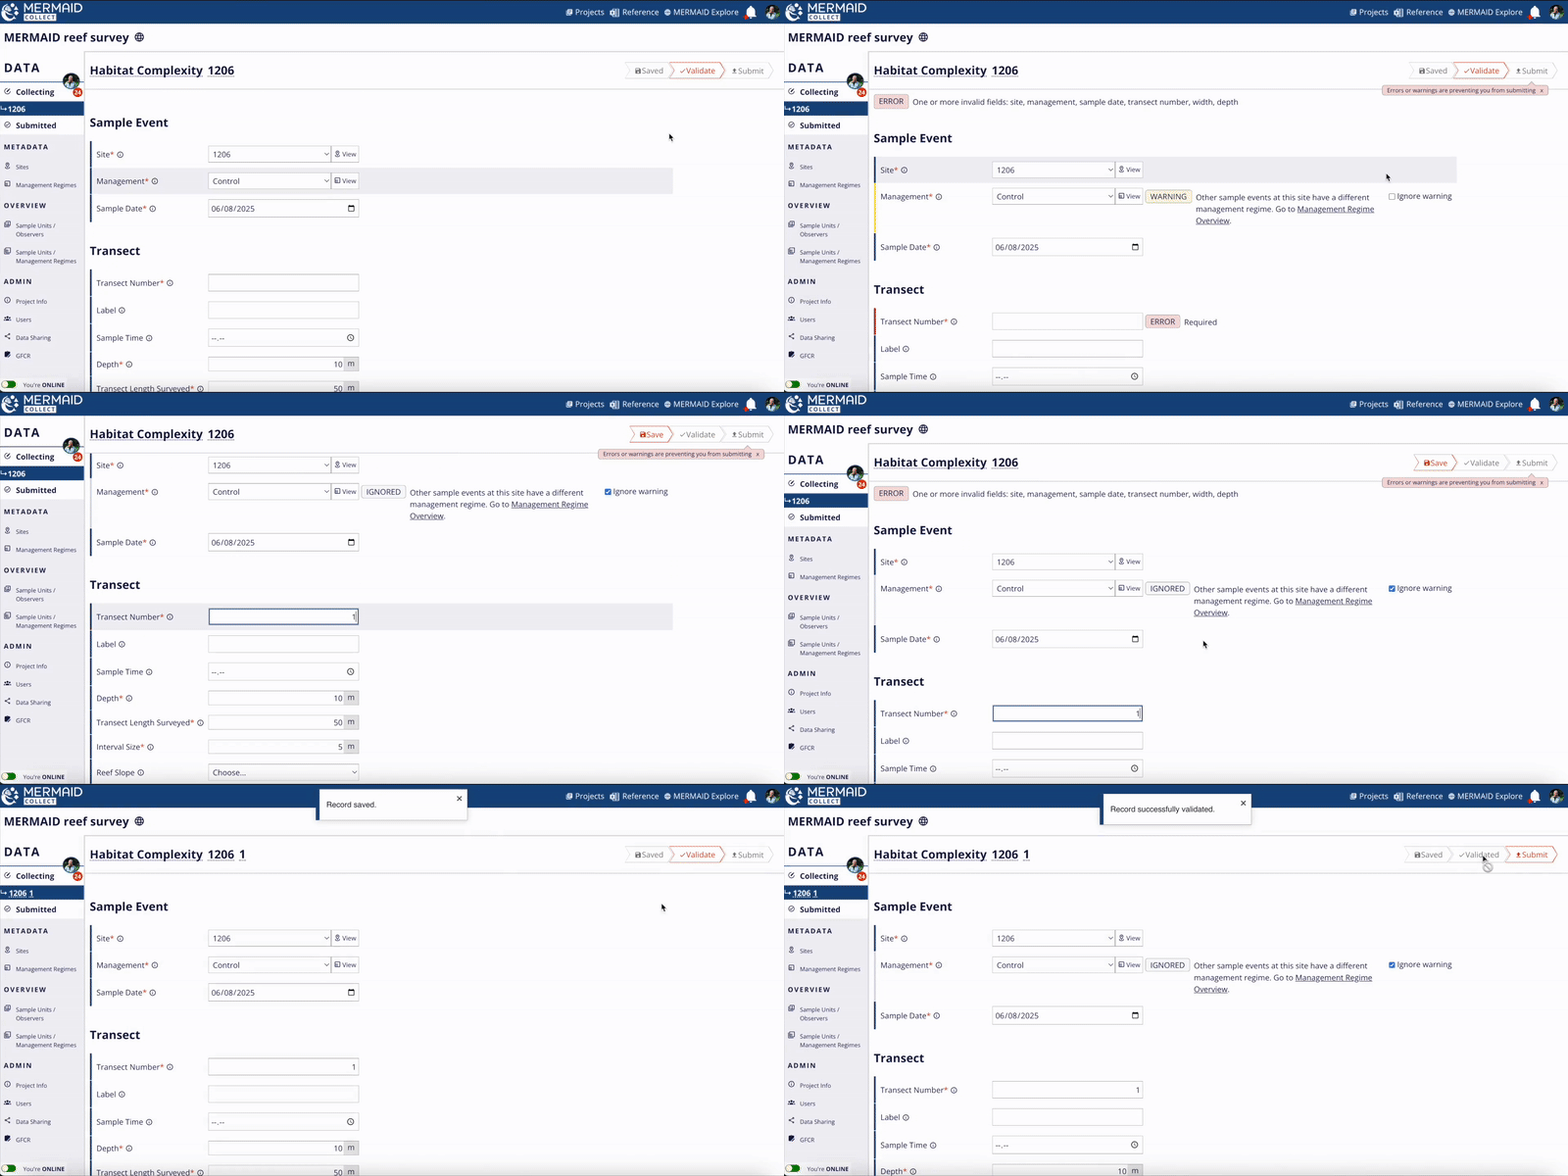
Validate your sample unit. MERMAID will check for errors and warnings.
Fix any errors (which prevent submission) and review warnings (which you can choose to address or ignore).
Submit the sample unit once it passes validation.

Important: You can only delete a sample unit before submitting it. To delete:
Deleted records cannot be recovered. Only an Admin can make edits to a submitted sample unit. For more information on user permissions, read more in Adding Team Members to a Project. |
Step 4: What happens after submission?
Once submitted, your data:
Moves to the Submitted page, where it is visible to all project members.
Is included in project export files (.xlsx format) and can be exported in the Submitted page.
Becomes accessible via the authenticated MERMAID R package.
Is visible and can be exported in MERMAID Explore if your project’s data sharing policy for that survey method is set to Public or Public summary. If Private, data is only visible to you and other project users via an authenticated login in MERMAID Explore.
Navigating the Collecting page
The Collecting page is where you enter, view, and edit sample units before they are submitted. Here’s how to use it:
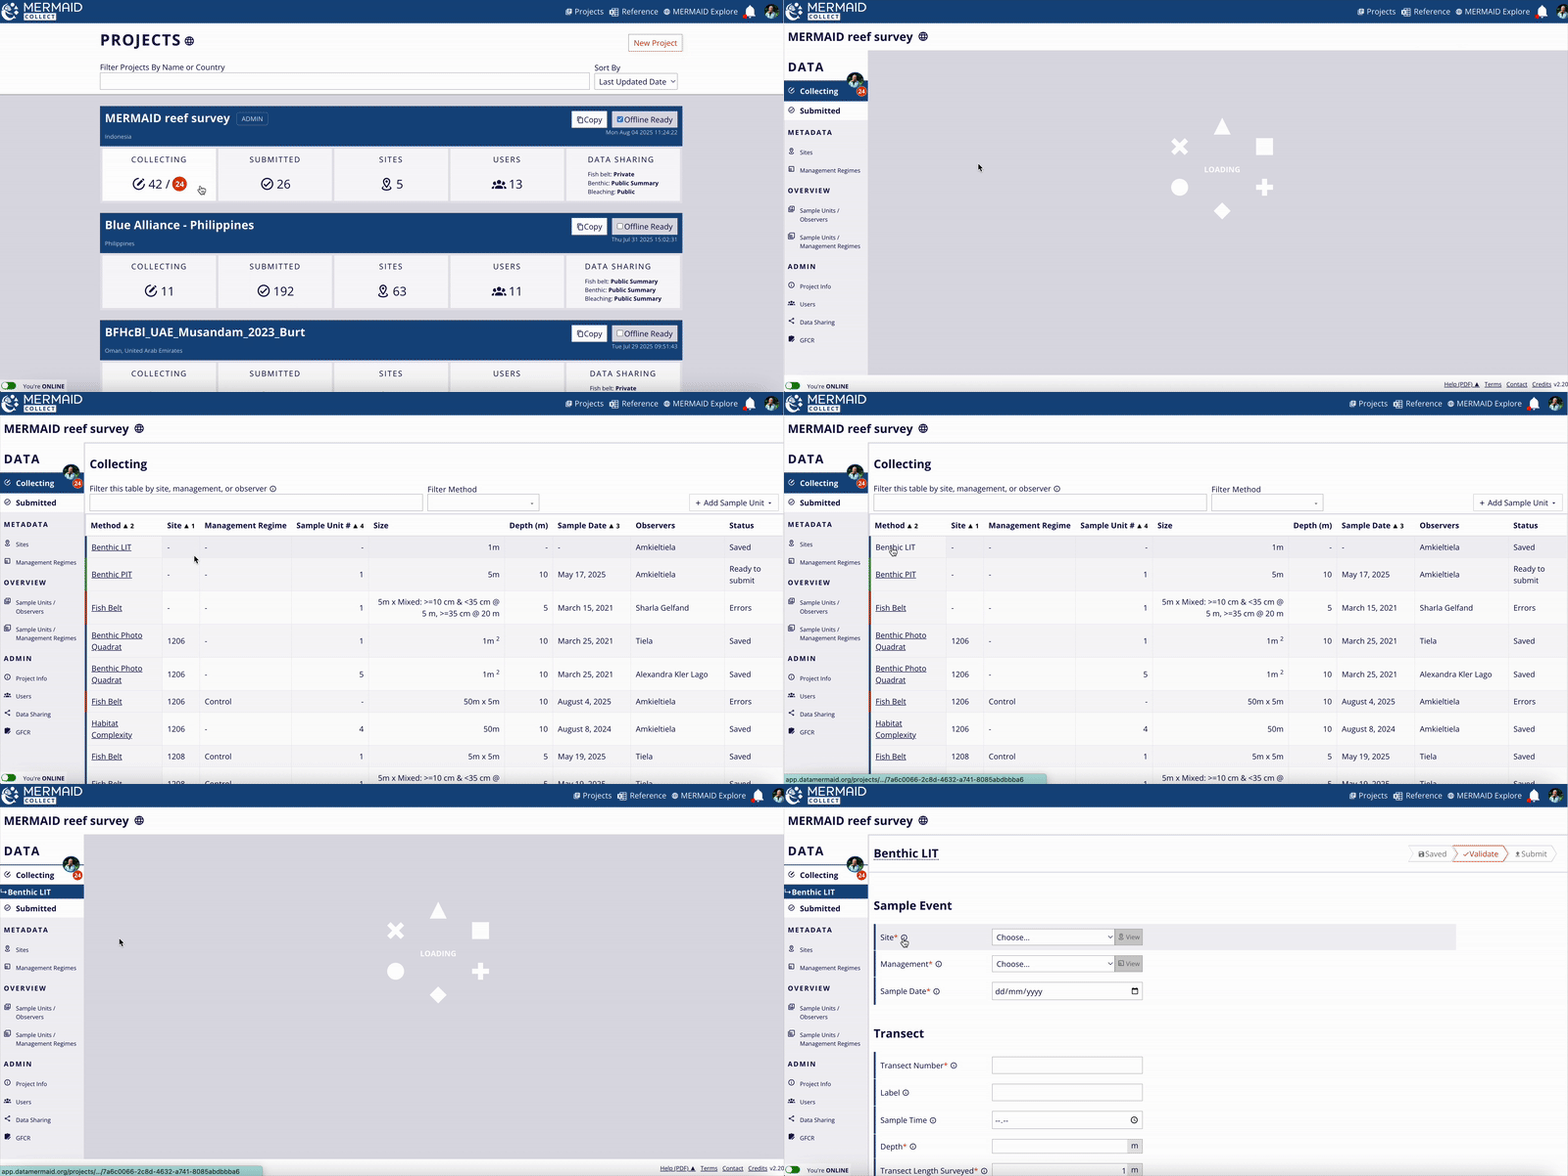
Go to your project’s Collecting page. You can access it by either:
Clicking on Collecting in your project’s sidebar, or
Clicking on Collecting in your project’s card in the Projects page. The Collecting tab in a project card displays two numbers separated by a slash.
Before the slash: The total number of unsubmitted sample units across the entire project.
After the slash (in a red circle): The number of unsubmitted sample units assigned to you in your Collecting page.
In your project's Collecting page, the number in a red circle shows how many sample units you’ve saved but not yet submitted.
Use the search bar or filters to quickly find sample units by method, site, management regime, or observer.
Click any column header to sort entries by that field. You can sort based on multiple fields.

Each sample unit in the list also displays a status column that helps you track your progress and identify what action is needed next:
Saved – The sample unit has been saved but not yet validated.
Errors – Validation failed due to error(s). Issues must be fixed before submission (e.g., missing required fields).
Warnings – Validated with unresolved warning(s). Some fields may need review or be ignored before submission.
Ready to submit – The sample unit has passed validation and can be submitted.
This makes it easy to monitor your work progress and manage what’s complete and what still needs attention.

Only users with the Collector or Admin role can enter and submit data. Read-only users cannot collect data and do not have access to the Collecting page.
MERMAID Collect on mobiles or tablets
MERMAID Collect works seamlessly on your phone or tablet—perfect for data entry between dives while on the boat or in remote locations.
There's no need for an app download: simply open your browser (i.e., Google Chrome, Mozilla Firefox, or Microsoft Edge) and go to app.datamermaid.org. The mobile and tablet interface works just like it does on a computer—allowing you to record observations quickly and reliably in the field.
