As a Convening Agent, you need to first sign up to a MERMAID account, login, then set up a project in Collect for your GFCR Program. You can learn about how to create your MERMAID account and project on Getting Started.
Set up your GFCR project
When creating your project in Collect, use the official name of your GFCR Program followed by a dash (-) and the country name(s) as your Project Name (e.g., Miamba Yetu Program - Kenya & Tanzania).
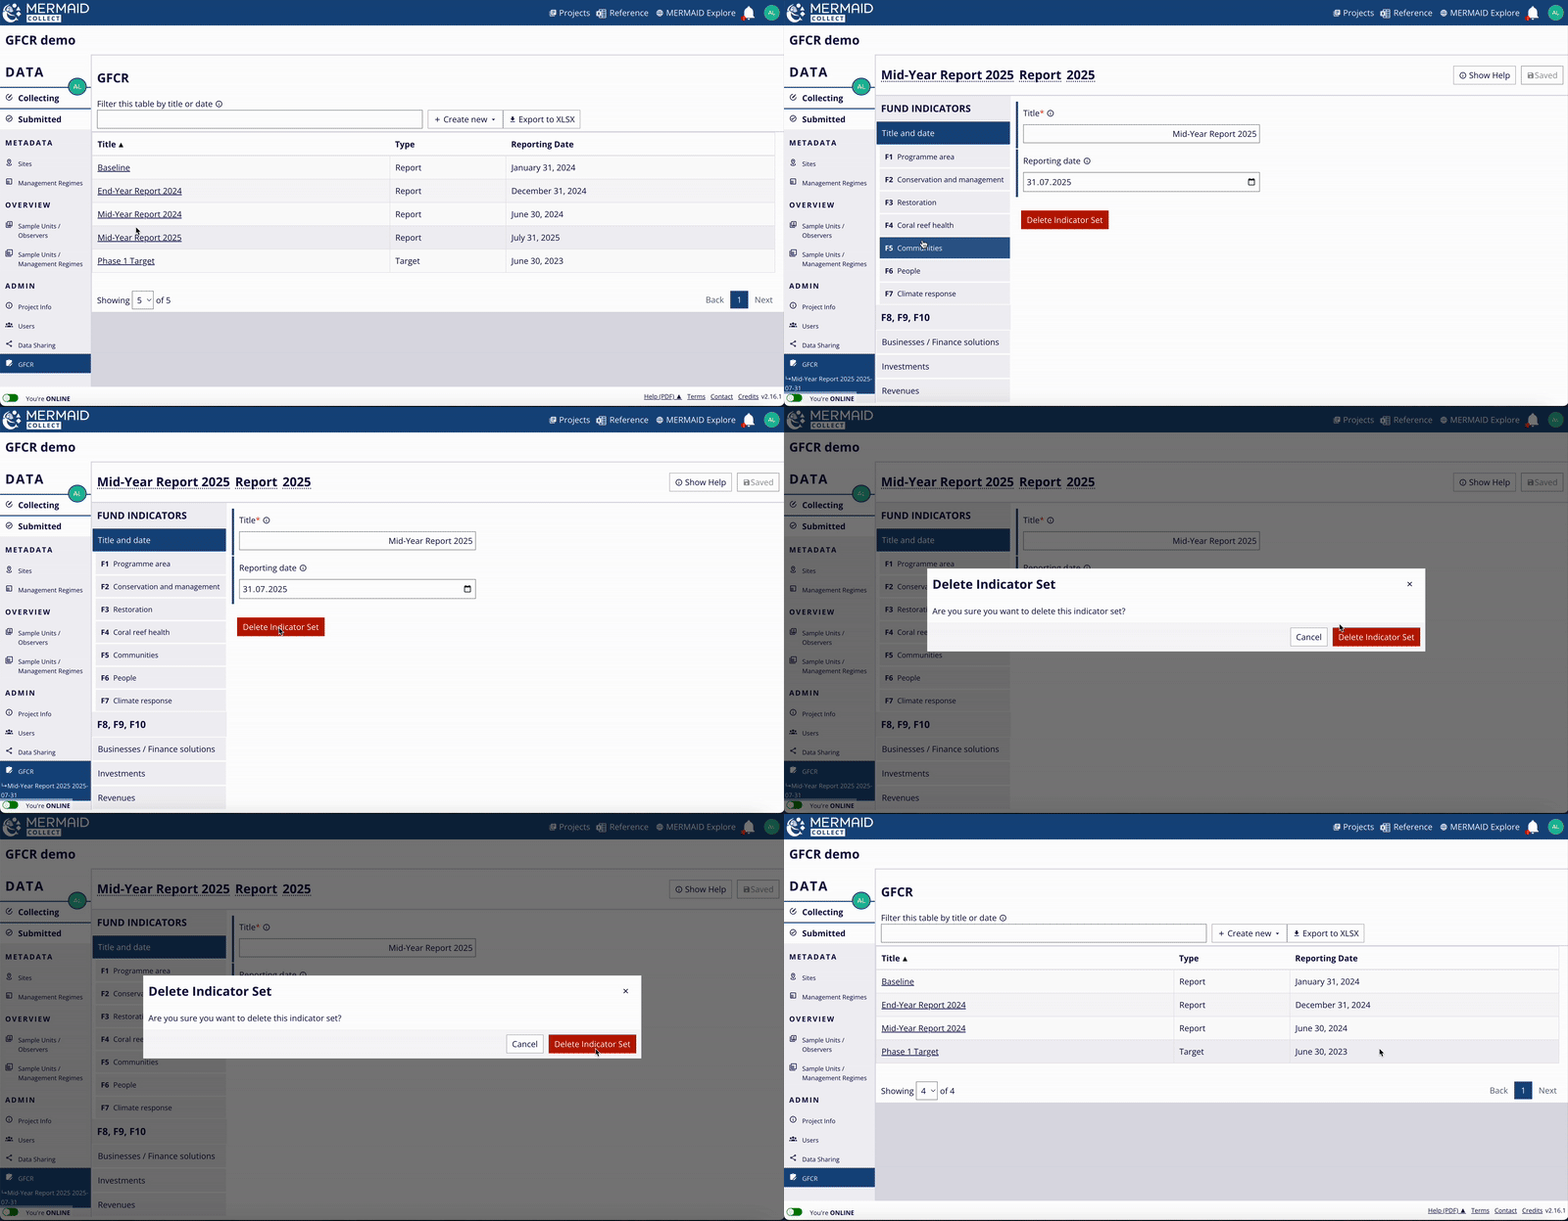
Once your GFCR project has been created, open your project and go to Project Info under ADMIN on the left-hand menu bar.
Add a short description of your GFCR Program in the Notes field.
Add all organization names (including partner organizations) in the Organizations field. If the organization name is not available in the dropdown options, you can suggest a new organization name to MERMAID. Read more in Setting up a new project. Remember to include Global Fund for Coral Reefs in Organizations. This is important for locating all GFCR Programs in MERMAID Explore.
If you need to add other users that will enter ecological data or sets of Fund Indicators in the GFCR project, or that simply need to visualize data, go to Users under Admin and add users by entering their email address. You may change the role of each user inside this page between admin, collector or read-only, according to type of permissions they need. Learn more in Setting up a new project.
Note: Only Admin users can create, edit and delete GFCR reports and targets. Make sure to check each user's role to confirm they have the right permissions. |
Enable the GFCR Indicators
GFCR Fund Indicators can be enabled by a single click inside your GFCR project.
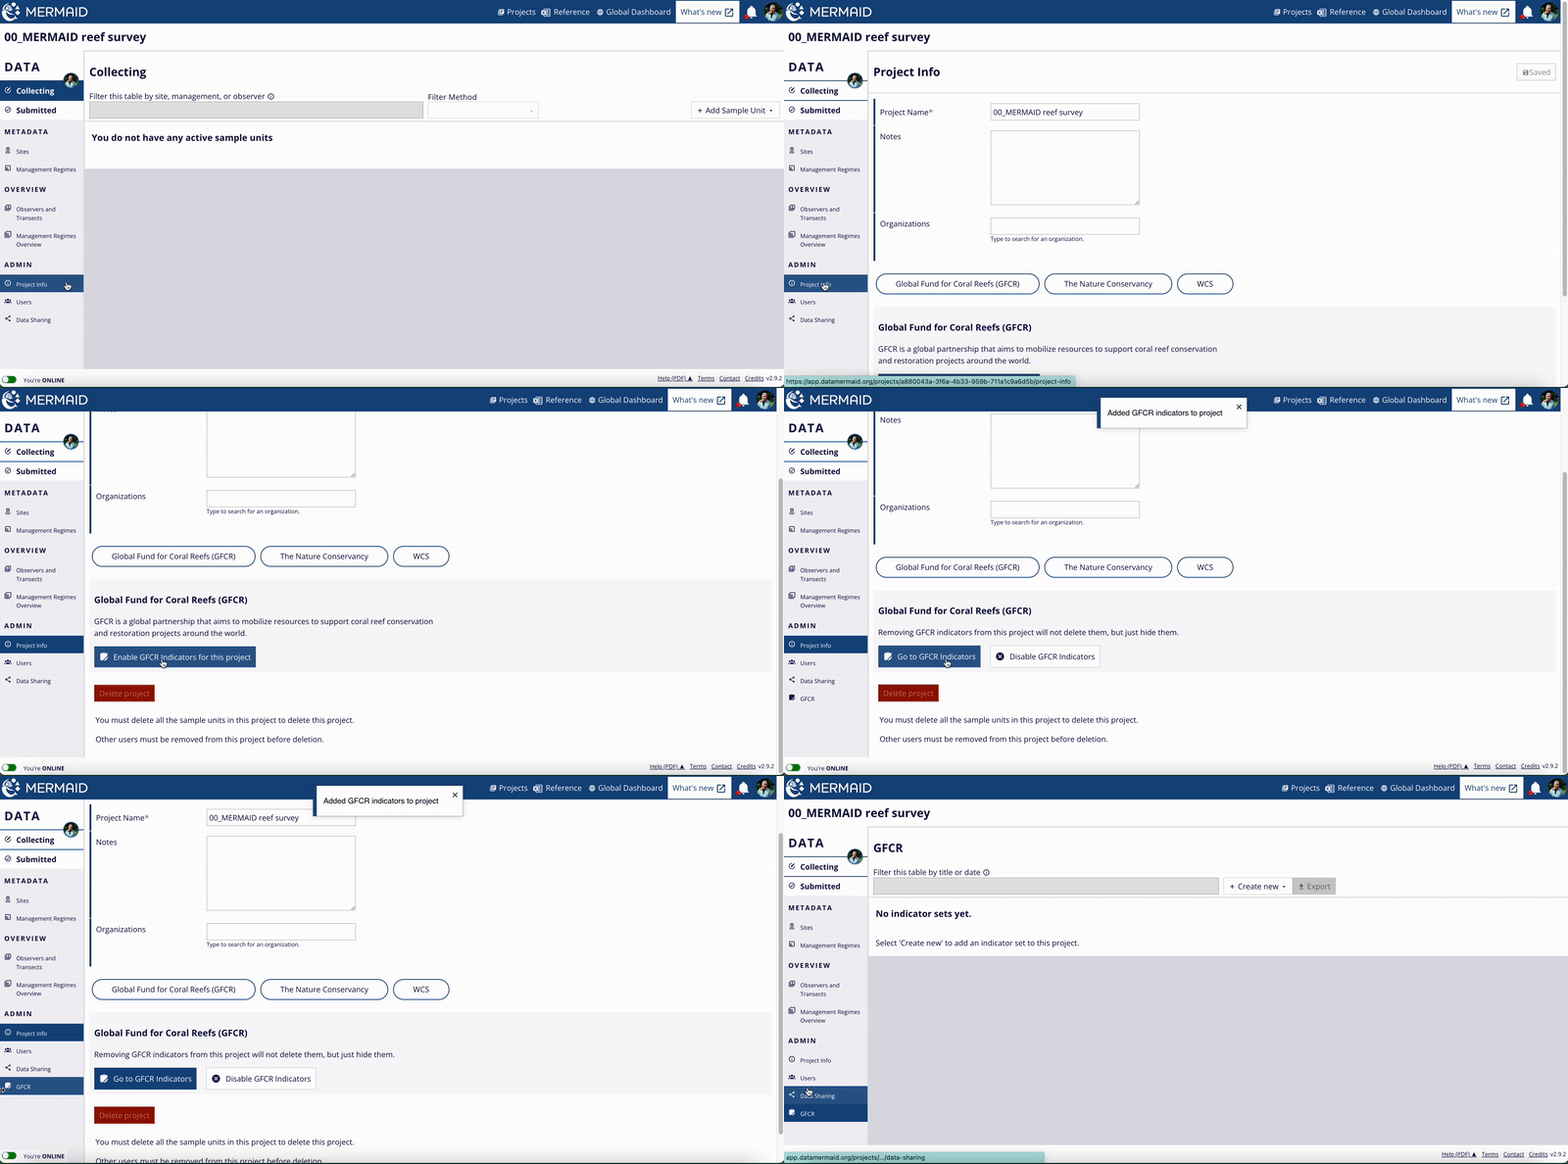
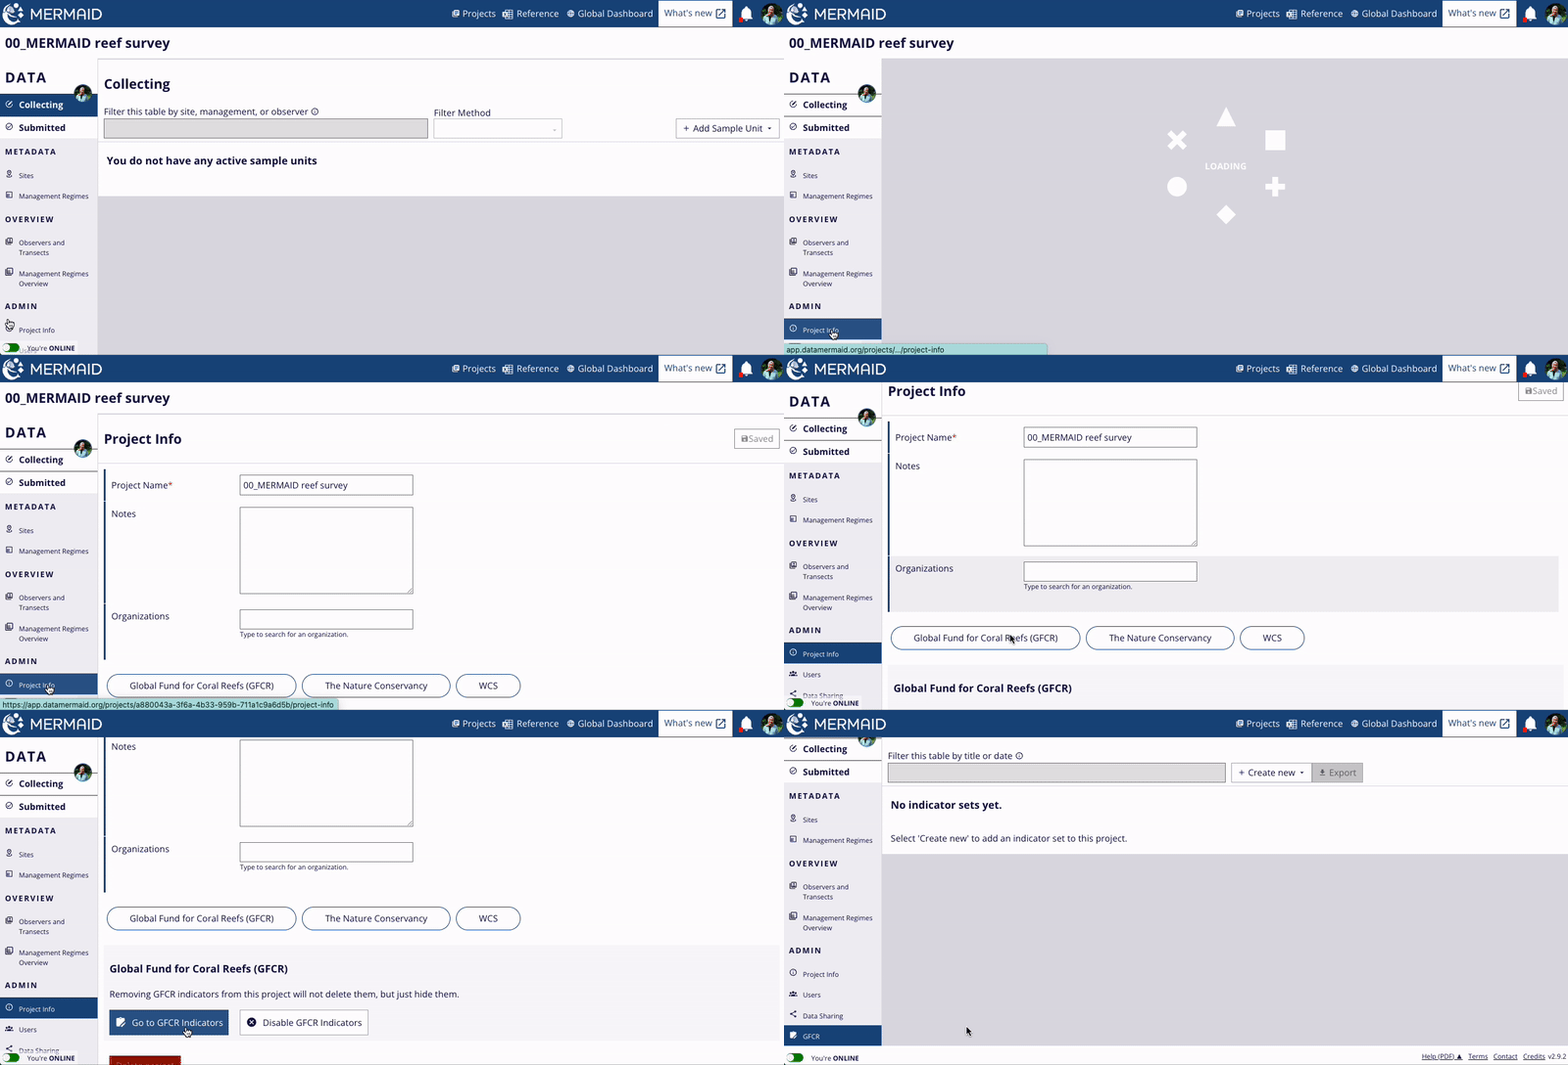
To access the GFCR page and create reports for Fund Indicators, you must first enable the GFCR Indicators by clicking the Enable GFCR Indicators for this project button on the Project Info page under the ADMIN section.
After you click the button, a GFCR page will appear under the ADMIN section on the left-hand menu bar.
Access this GFCR page by clicking on the Go to GFCR Indicators button from the Project Info page or directly by clicking on the GFCR page under the ADMIN section on the lefthand menu bar.
On this page, you can create new sets of Fund Indicators as targets or reports, visualize them, make changes, and download them.
Create your target GFCR Fund Indicators
Important: Each GFCR project should establish three sets of targets for the entire duration of the Program. As new business / finance solutions are added to the Program, these targets can be adjusted accordingly. |
We recommend labelling each set of targets as "Phase 1 Target", "Mid-Term Target" and "Final Target" accordingly.
To create a new set of GFCR Fund Indicators as targets for your GFCR project:
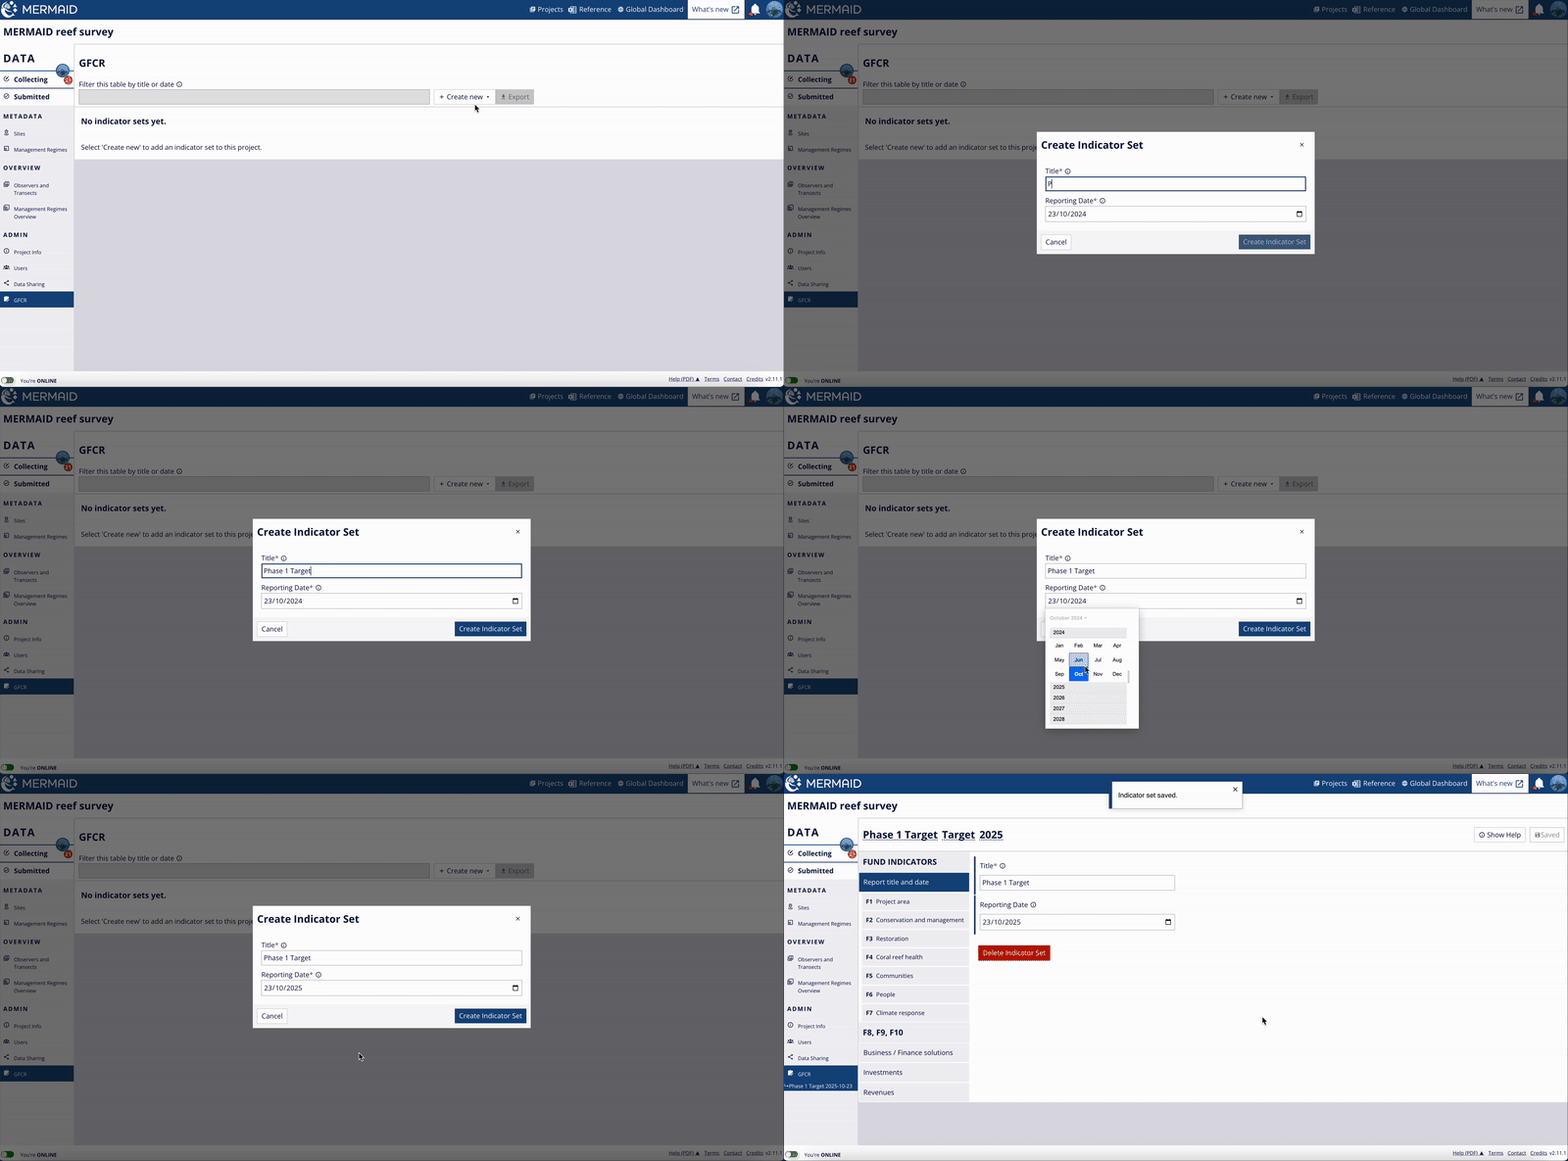
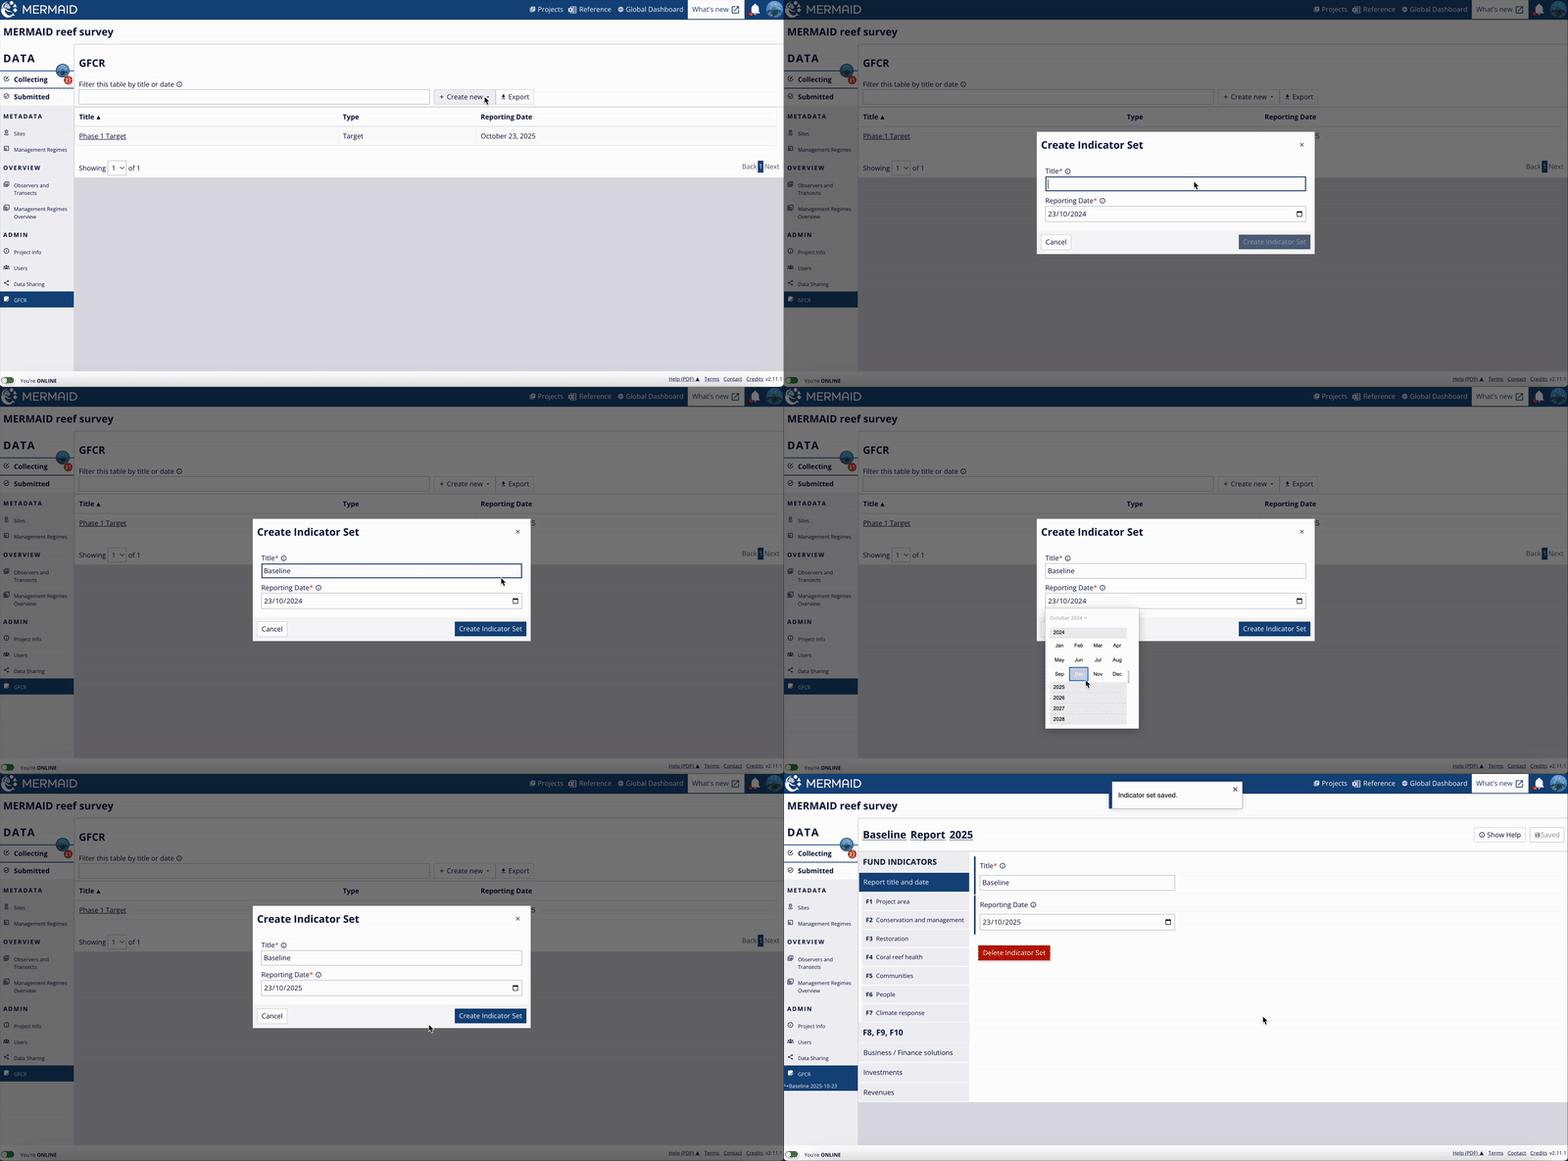
Go to the GFCR page, click on the + Create new button, then select Target.
Fill in the Title and Reporting Date, click on the Create Indicator Set button. Reporting date should should correspond to the end date of the reporting period for specific target.
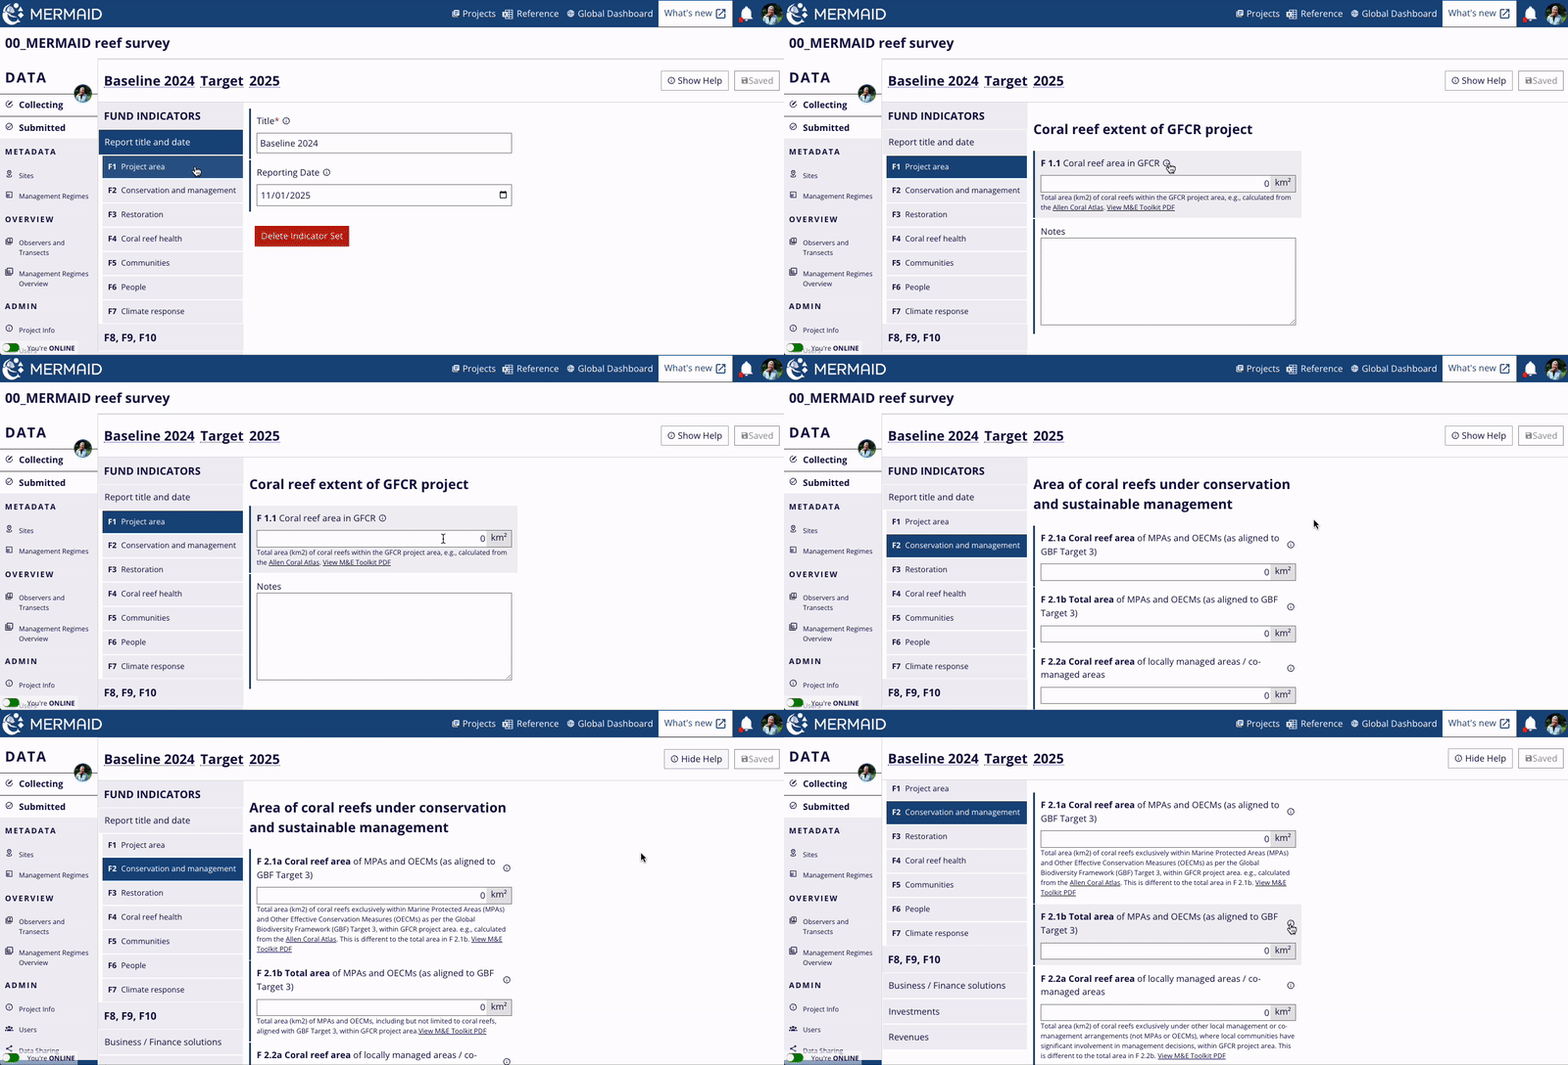
You will visualize all 10 Fund Indicators (F1-F10) on the sidebar. Inside each section, add the values for each sub-indicator, then click on the Save button on the top-right corner. If the value entered does not match the validation criteria (e.g., number is too large, not an integer number), the Fund Indicator will not be saved. You should verify your entry to ensure it is entered and saved correctly.
You can always make changes to your saved target indicators by selecting the set of targets your want to edit from list on the main GFCR page.
Create a report of GFCR Fund Indicators
Important: Each GFCR Program will have a baseline report followed by bi-annual reports to track progress against established targets. |
We recommend labelling each report as "Baseline," "Mid-Year Report [Year]," or "End-Year Report [Year]" accordingly.
The steps are very similar to creating a target for GFCR Fund Indicators:
Go to the GFCR page, click on the + Create new button, then select Report.
Fill in the Title and Reporting Date, click on the Create Indicator Set button. The reporting date should correspond to the end date of the reporting period for either the baseline or bi-annual report (e.g., for an End-Year Report, the end date is December 31, so you would enter 31/12 followed by the year).
You will visualize all 10 Fund Indicators (F1-F10) on the sidebar. Inside each section, add the values for each sub-indicator, then click on the Save button on the top-right corner. If the value entered does not match the validation criteria (e.g., number is too large, not an integer number), the Fund Indicator will not be saved. You should verify your entry to ensure it is entered and saved correctly.
Note: Even if your GFCR Program does not engage in specific activities related to any indicators, you are still required to report on all of them. If your Program does not engage in the activity, the default values are set to '0', and you may leave them as is if no related activities are being conducted. |
You can always make changes to your saved reported indicators by selecting the report your want to edit from list on the main GFCR page.
For all Fund Indicators, there is a Notes field where you can add additional information to support the analysis and interpretation of your indicators, as well as for your annual narrative report to be submitted to GFCR.
If you enter a value of '0' for any sub-indicator, please specify in the Notes section whether this represents a true zero (i.e., the sub-indicator is not applicable to your Program) or missing data (e.g., data not yet collected for that sub-indicator).
MERMAID provides help text for each of the 37 sub-indicators to assist you with completing them. Simply click on the tool tip 'i' next to the sub-indicator or click on the Show Help on the top right to show all the help texts for all sub-indicators.
Delete a target or report of GFCR Fund Indicators
To delete a target or report:
Navigate to the GFCR page
Click on the title of the target or report you wish to delete.
In the first section Title and date, click on Delete Indicator Set to remove the selected item.
Important: This action is permanent. Once a report or target is deleted, it cannot be recovered. |
