Before you dive into collecting data in MERMAID Collect, there are just a few simple things to set up in your project. You’ll add your organization, invite your team, choose how to share your data, and set up your survey sites and management types—so everything is ready to support your work and make collaboration easy.

Step 1: Add project info and organization
Adding more information about your project is a great way to provide additional context and to categorize your surveys so that other users discovering data in MERMAID Explore can better understand your project’s purpose and scope. In addition, adding your organization helps categorize your surveys and makes it easier to search later—both in MERMAID Explore and via the MERMAID R package.
To describe your project and add your organization(s):
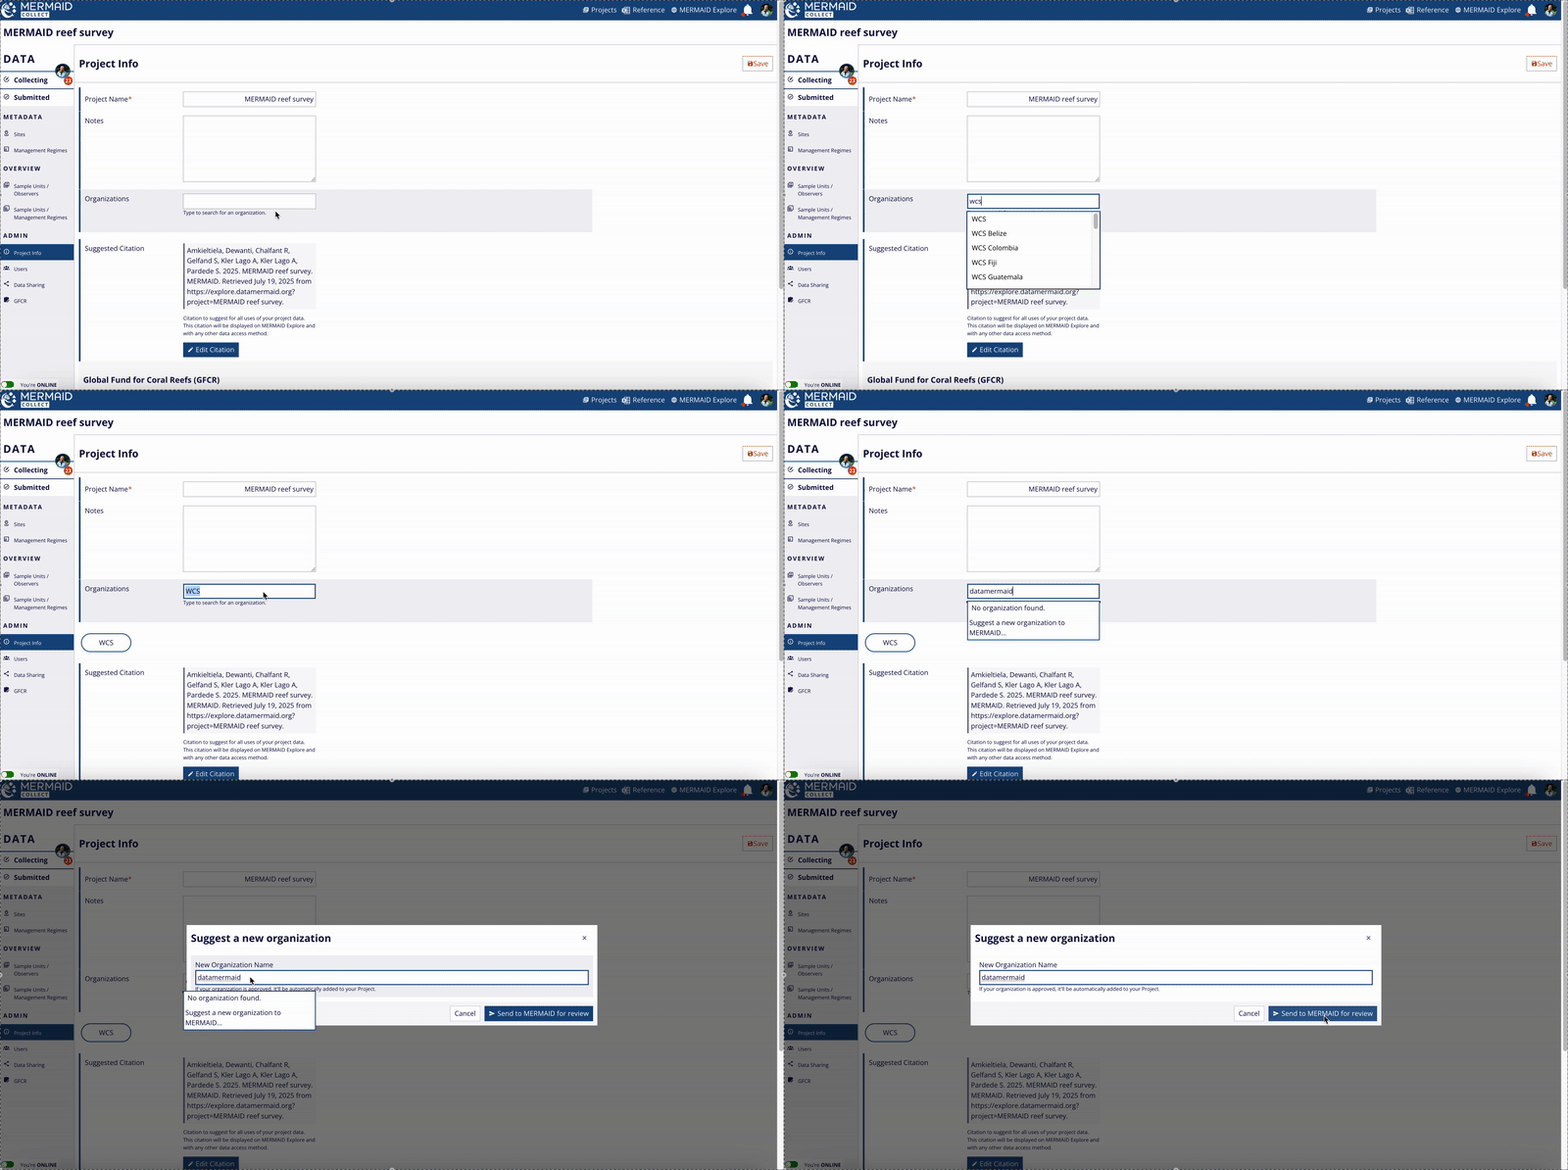
Go to Project info under the ADMIN section in your project’s sidebar.
In Notes, enter a description or any detail you’d like to add about your project.
In Organization, Start typing your organization’s name and select it from the dropdown.
If your organization doesn’t appear:
Choose Suggest a new organization to MERMAID
Enter the official name and acronym (e.g., Great Barrier Reef Marine Park Authority (GBRMPA))
Click Send to MERMAID for review. Once sent, it’ll become available in the dropdown list and added to your project.
You can add multiple organizations, one at a time—including partner organizations involved in the project. This helps ensure everyone contributing is properly represented and their work is easily searchable later.
You can also edit your project's name from this page if you need to update or correct it after the initial creation.
Note: Please double-check your spelling before submitting an organization for review. Use the official name, capitalized, followed by the acronym in parentheses. |

Click Save in the top-right to confirm your updates.
Step 2: Invite users
A project becomes more powerful with collaboration. To invite team members:
Navigate to the Users page under the ADMIN section in your project’s sidebar.
Enter the email address of your user(s) and click +Add user.
Assign a role to each user: Admin, Collector, or Read-only.
Learn more about our user roles and permissions in Adding Team Members to a Project.
Note: Users must have a MERMAID account to interact in the project. If you add someone without an account, they’ll show as (pending user) until they sign up. |

Step 3: Choose the data sharing policies
Deciding how your project data will be shared helps you manage visibility and collaboration within the MERMAID community.
To choose the data sharing policies for your project:
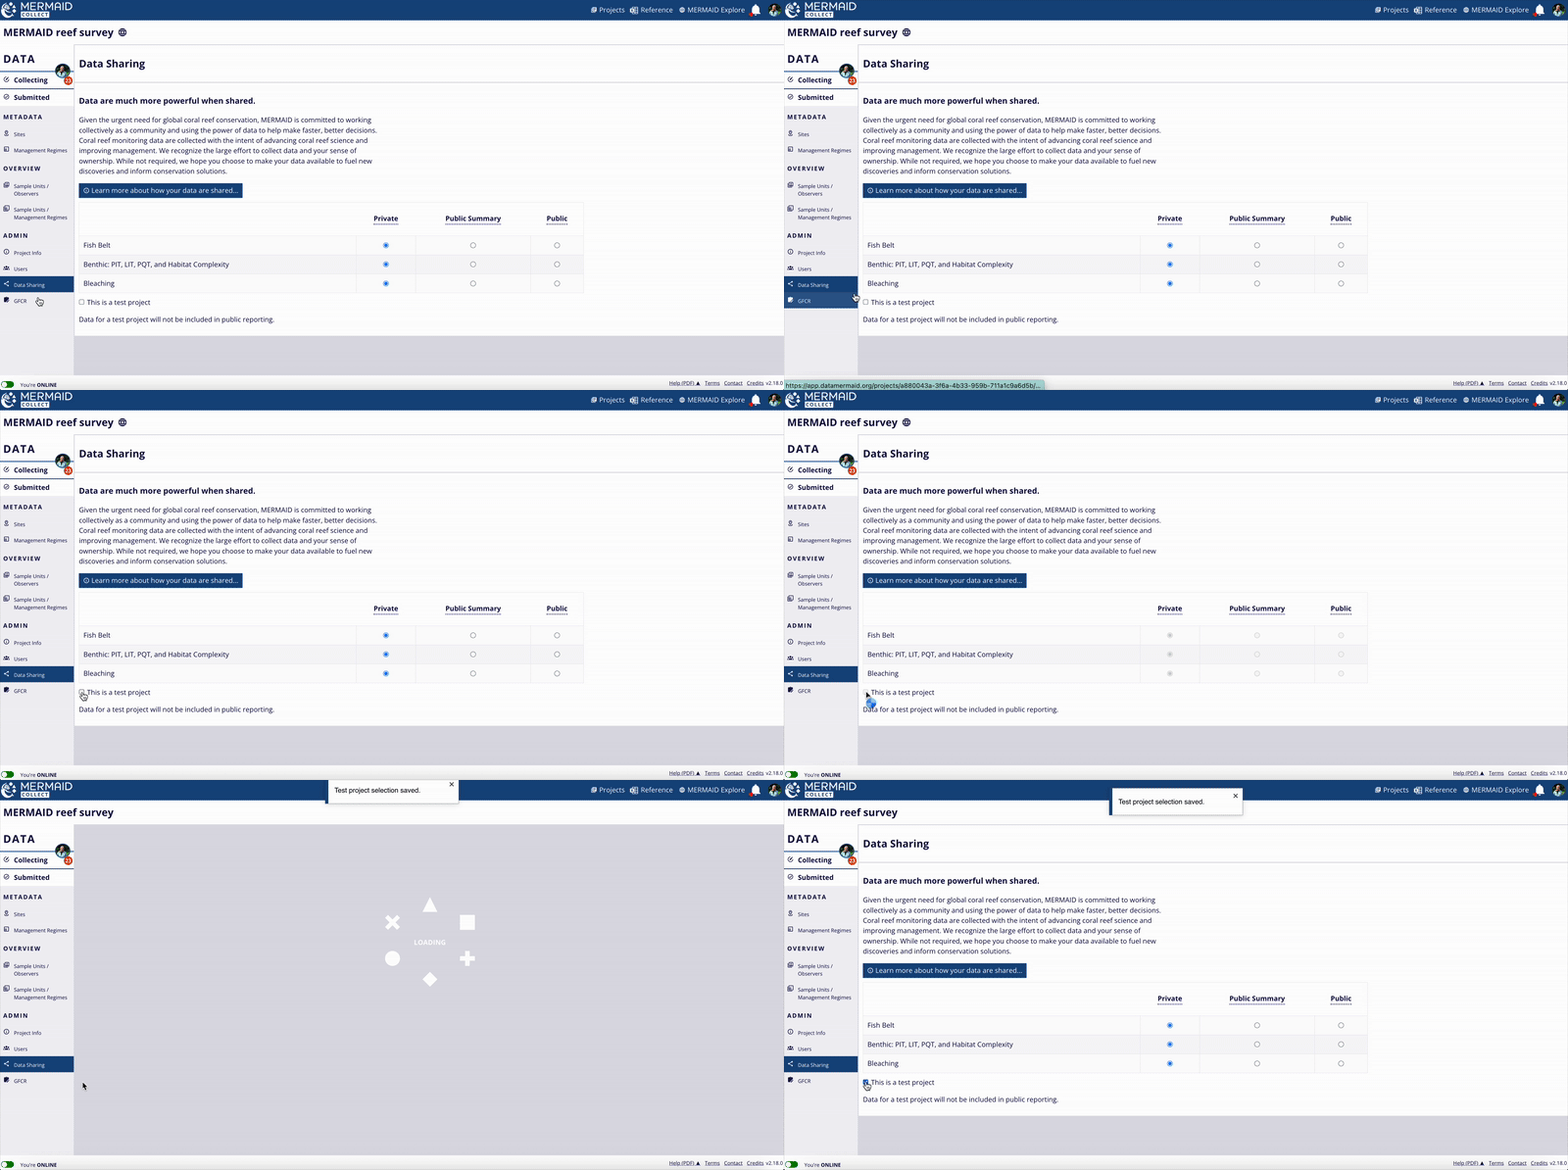
Go to Data sharing under the ADMIN section in your project’s sidebar.
Choose your preferred option for each survey type (Benthic, Fish, and Bleaching): Private, Public summary, or Public.
Learn more about our data sharing policies in Managing Data Sharing in a Project.
You can adjust your data sharing settings any time after creating a project, and you can choose different policies for different survey methods (e.g., private fish vs. public benthic data).

Step 4: Add survey sites
Now it’s time to add the sites where your surveys will take place. Sites are a core part of your survey’s metadata—they define where your observations are collected. Each site represents a geographic location, and it must be added before you can collect any survey data in your project. Adding survey sites can be done online and offline. However, we strongly recommend adding sites while online before heading to the field to ensure that all users have synchronized project data and are working with the most up-to-date site information.
To add sites:
Go to Sites under the METADATA section in your project’s sidebar.
You’ll see two options:
+ New site – Create a brand new site with fresh details.
Copy sites from other projects – Save time by pulling in sites you or other users have used before. You can search sites by name, project, or country.
Read more about sites in Managing Metadata in a Project.

Step 5: Add management regimes for your sites
Management regimes are another key part of your survey’s metadata. They describe the rules or restrictions in place at a site when the survey was conducted—like whether your site is inside a no-take zone or an open-access area. Adding these details helps contextualize your data and enhances its value for analysis and reef management. Similar to adding sites, management regimes can be added online and offline. However, we strongly recommended to add management regimes while online before heading to the field. This step is to ensure that all users can access the most up-to-date management regimes.
To add management regimes:
Go to Management regimes under the METADATA section in your project’s sidebar.
You’ll see two options:
+ New MR – Create a brand new management regime (MR) with fresh details.
Copy MRs from other projects – Save time by pulling in MRs you or other users have used before. You can search MRs by their name, project, or year.
Read more about management regimes in Managing Metadata in a Project.
Is your project for testing or training?
If you’re experimenting or training others how to use MERMAID Collect, you can flag your project as a test.
To do this:
Check This is a test project at the bottom of the Data sharing page.
Note: Test projects are not included in MERMAID Explore summaries or visualizations. This helps keep training data separate from real data and ensures that statistics and insights reflect only actual survey results. |
