MERMAID Easy PQT is a user-friendly Shiny app designed to help you import photo benthic quadrat data annotated in CoralNet into MERMAID—without requiring any coding in R.
If you're not comfortable using the MERMAID R package mermaidr, Easy PQT is an excellent alternative. It streamlines the process and guides you through each step, ensuring your data is correctly formatted and imported.
Before using MERMAID Easy PQT, you’ll need a verified MERMAID account. See Getting started.
Note: With MERMAID Easy PQT, only project admins can import data into projects in MERMAID Collect, and also test projects won’t appear in the projects’ list. |

Step 1: Prepare Your Project in MERMAID Collect
Before importing data, your project needs to be set up in MERMAID Collect:
Set up a new project (or check that you have an existing project ready for the data import):
Add your organization(s).
Add users and assign their roles.
Set data sharing policies.
Add sites and management regimes associated with the data you are importing.
Read more in Setting up a project.
Step 2: Export Data from CoralNet
To export data from CoralNet:
Navigate to your CoralNet project > Images > Image Actions > Export Annotations, CSV.
Select the label format Both.
Include optional columns: Image metadata – date and auxiliary fields.
Make sure auxiliary fields include: Site, Management regime, and Transect number (names can be customized). If you haven’t use the auxiliary fields, you need to set it up in your CoralNet project (more info on how to add auxiliary fields can be found in the Calcification Metrics in CoralNet help page under the Different table for different images section.

Step 3: Open MERMAID Easy PQT
Navigate to the MERMAID Easy PQT
Easy PQT will prompt you to authenticate using your MERMAID credentials.
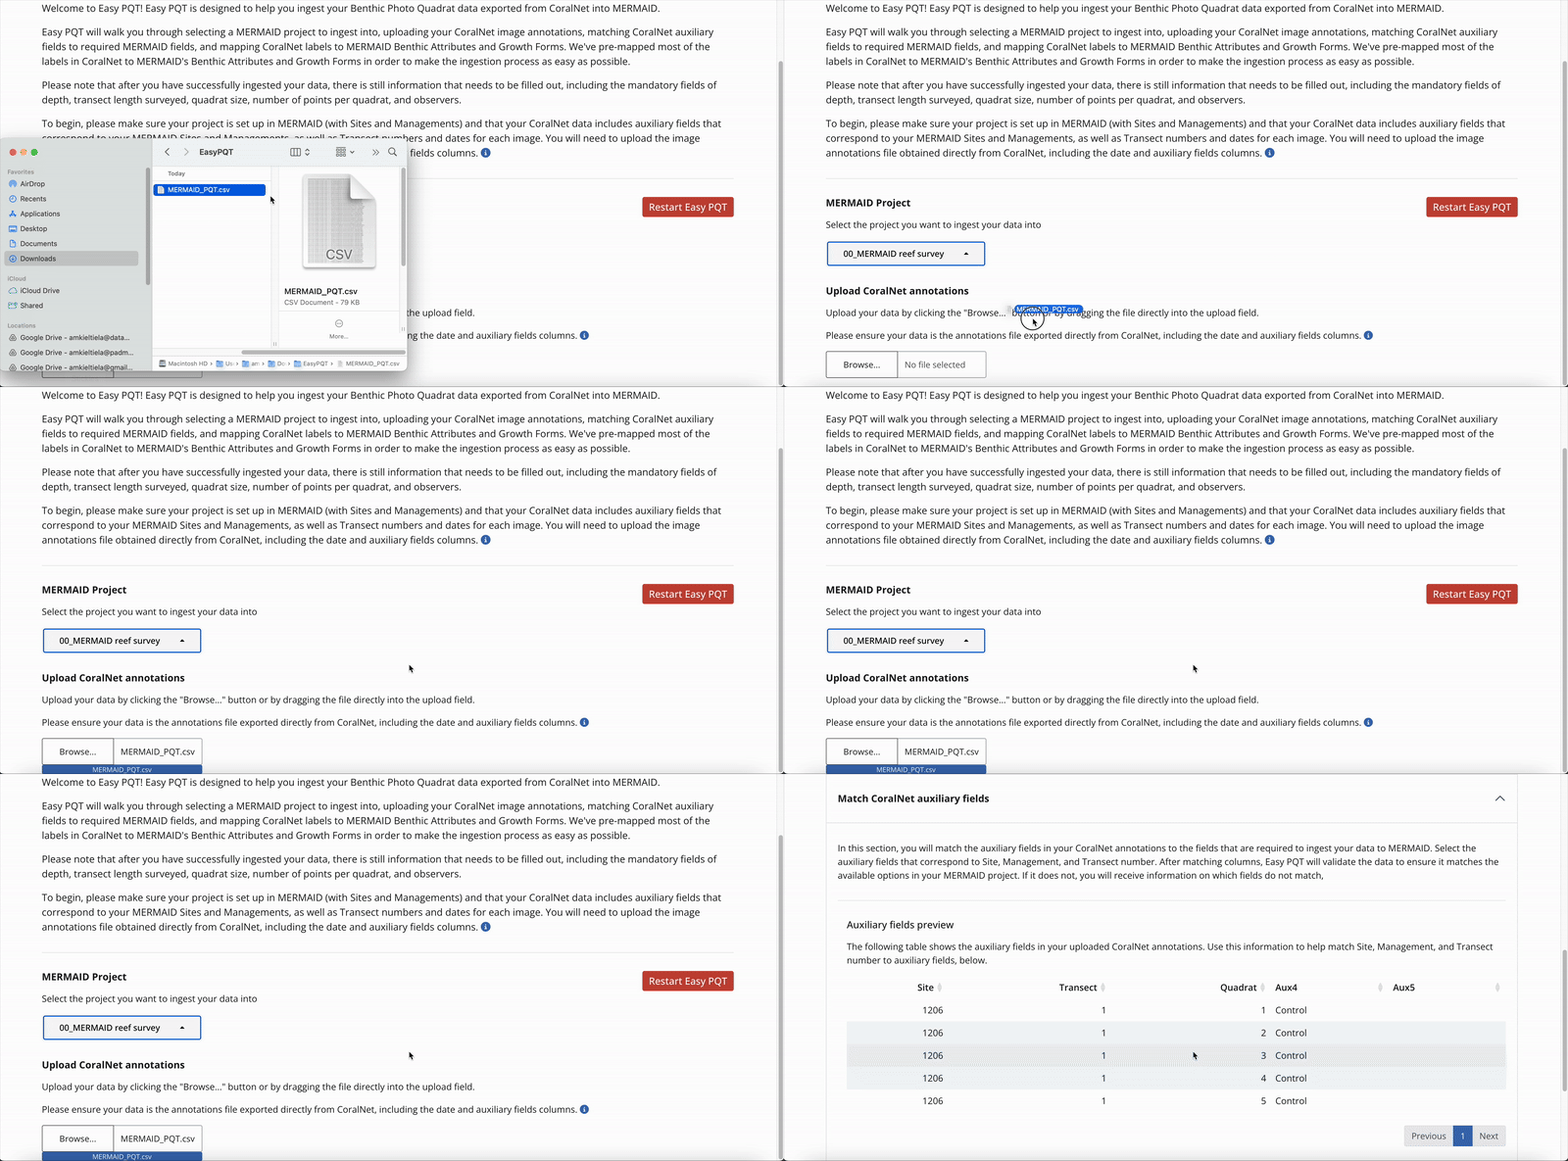
Under MERMAID project, a list of your non-test projects will be displayed. Choose which project to import your CoralNet data to.
Note: Only projects not marked as test will appear in the Select a project dropdown. |

Step 4: Upload CoralNet CSV file
Upload your CoralNet CSV file by clicking Browse or drag and drop your file into the upload modal. Easy PQT will automatically read your file.
Step 5: Match auxiliary fields
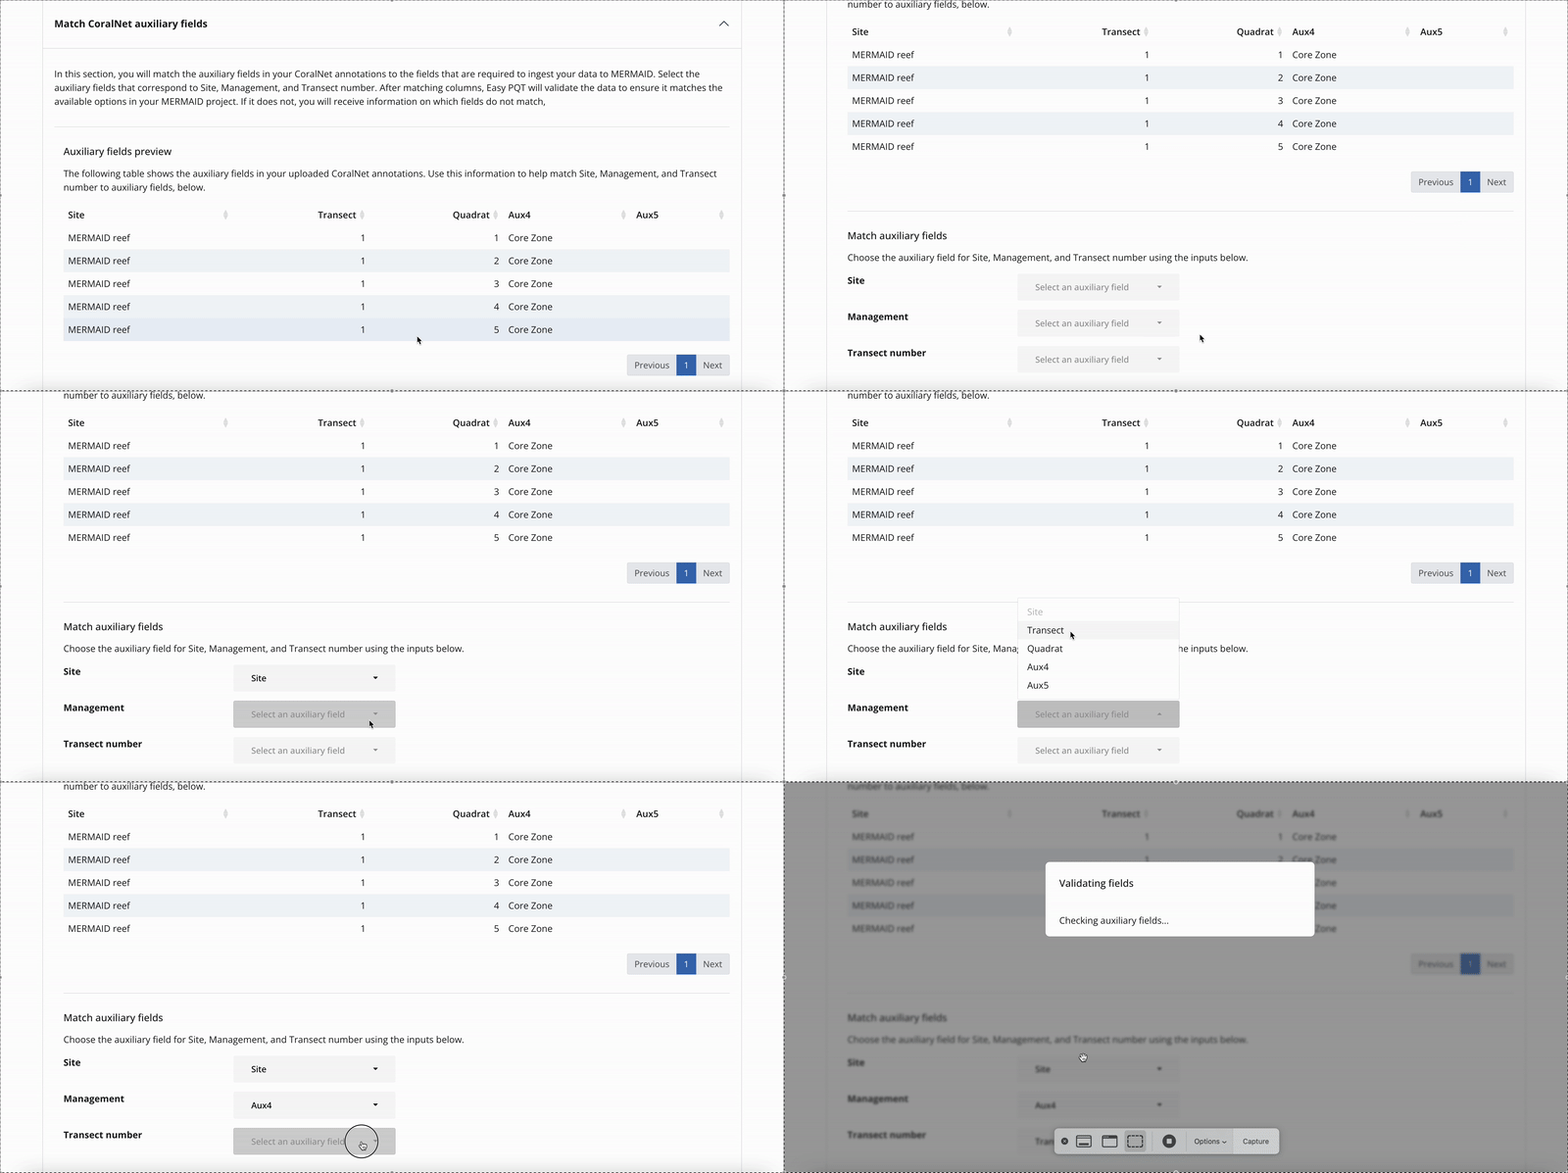
Match your CSV’s auxiliary columns with Site, Management, and Transect values in your MERMAID project.
Easy PQT will validate your entries and highlight any mismatches with guidance.
Step 6: Assign CoralNet labels to MERMAID benthic attributes
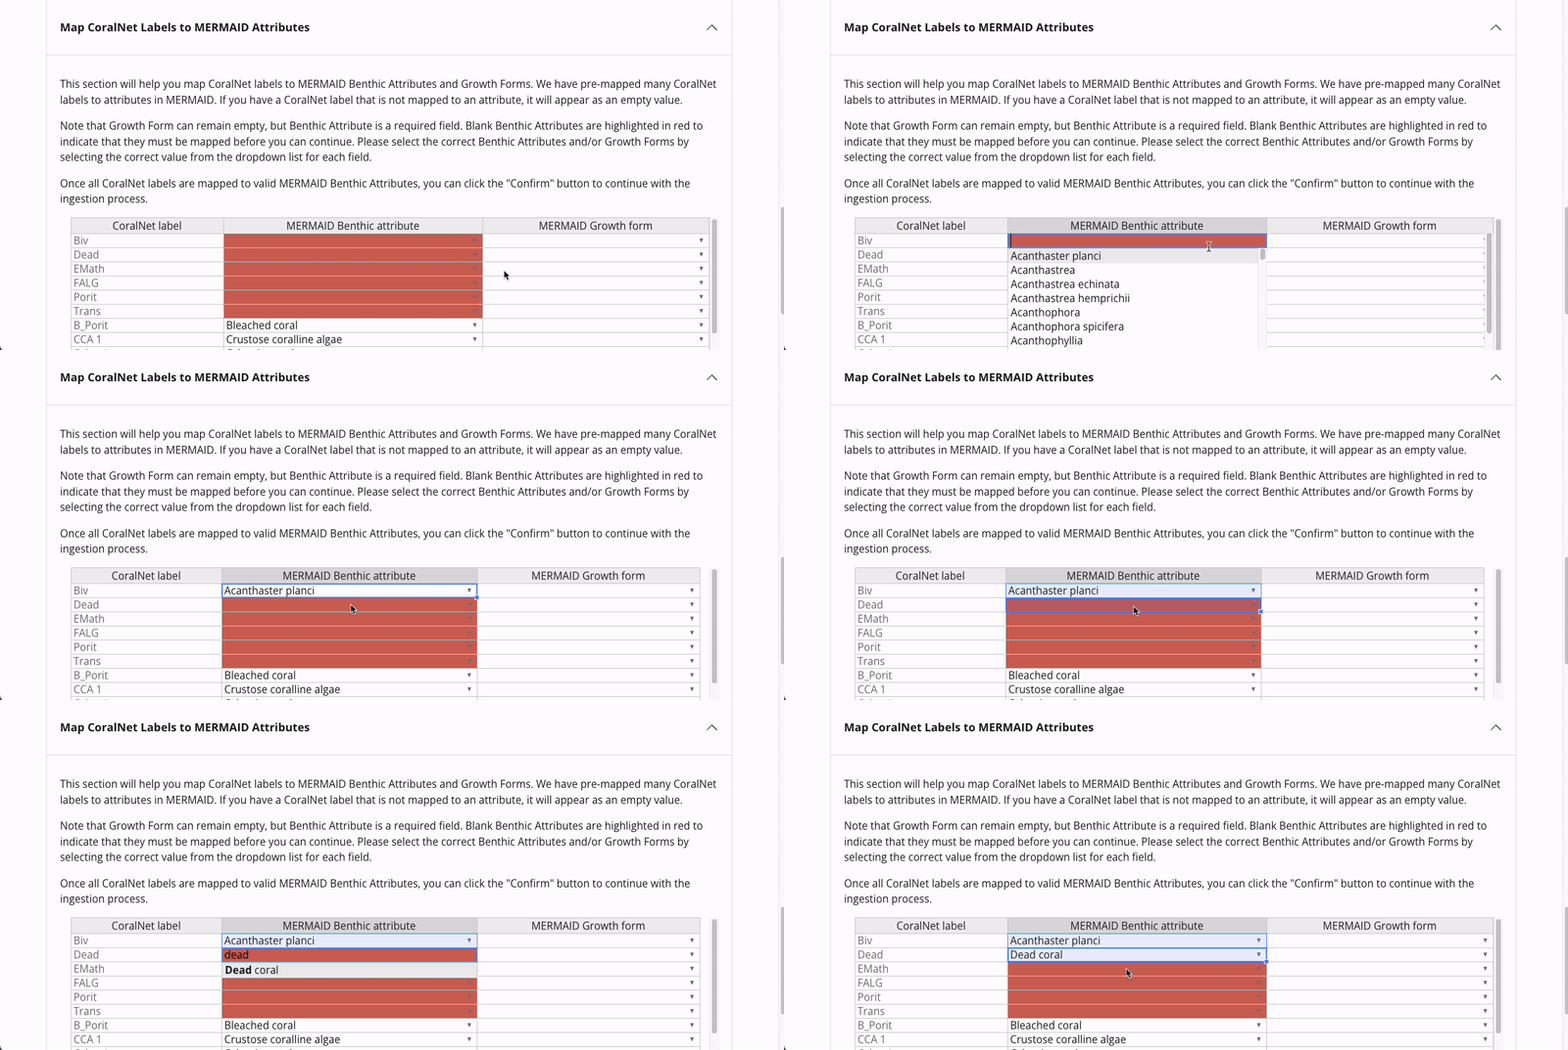
MERMAID Easy PQT automatically assigns CoralNet labels to MERMAID benthic attributes and/or growth forms.
Any unassigned values appear in red at the top of the table. Click and type or use dropdowns to assign the correct benthic attribute and/or growth form.
Note: You can leave the MERMAID Growth form column empty, but the MERMAID benthic attribute is a required field. |
Once all of your labels are assigned and reviewed to valid MERMAID benthic attributes, you can click the Confirm button to continue the importing process.
Step 7: Review and import data into MERMAID
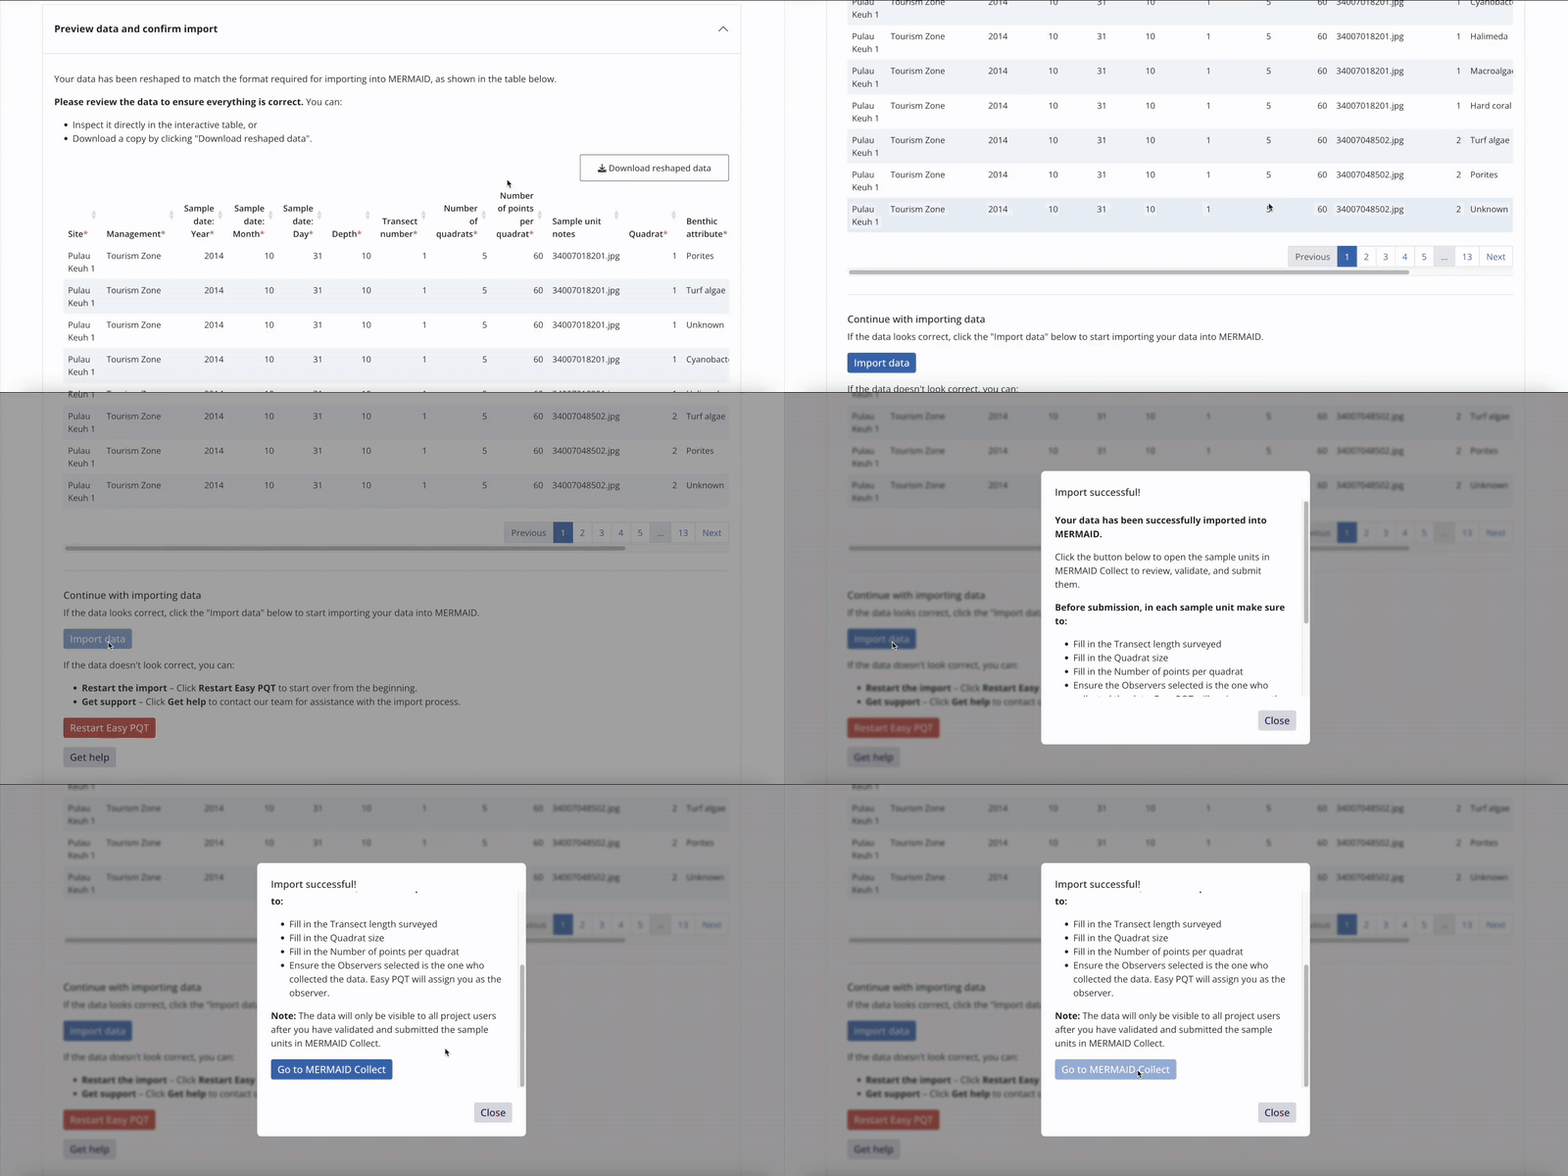
Once your data is reshaped and validated, click Import data.
Alternatively, you can restart by clicking on the Restart Easy PQT button or get help by clicking on the Get Help button if something doesn't look right.
You can also download the reshaped dataset as a CSV by clicking the Download reshaped data button on the top right of the table.
Once the importing process is complete, you’ll receive a confirmation message on your screen: Import successful!
You can either close the window or scroll to the bottom and click on Go to MERMAID Collect to finalize the import process in MERMAID Collect.
Step 8: Complete sample units in MERMAID Collect
Go to your Collecting page in your project.
Complete required fields: depth, transect length, and quadrat size.
Verify observer info. MERMAID will automatically assign you as the observer. You can change the observer if someone else collected the data.
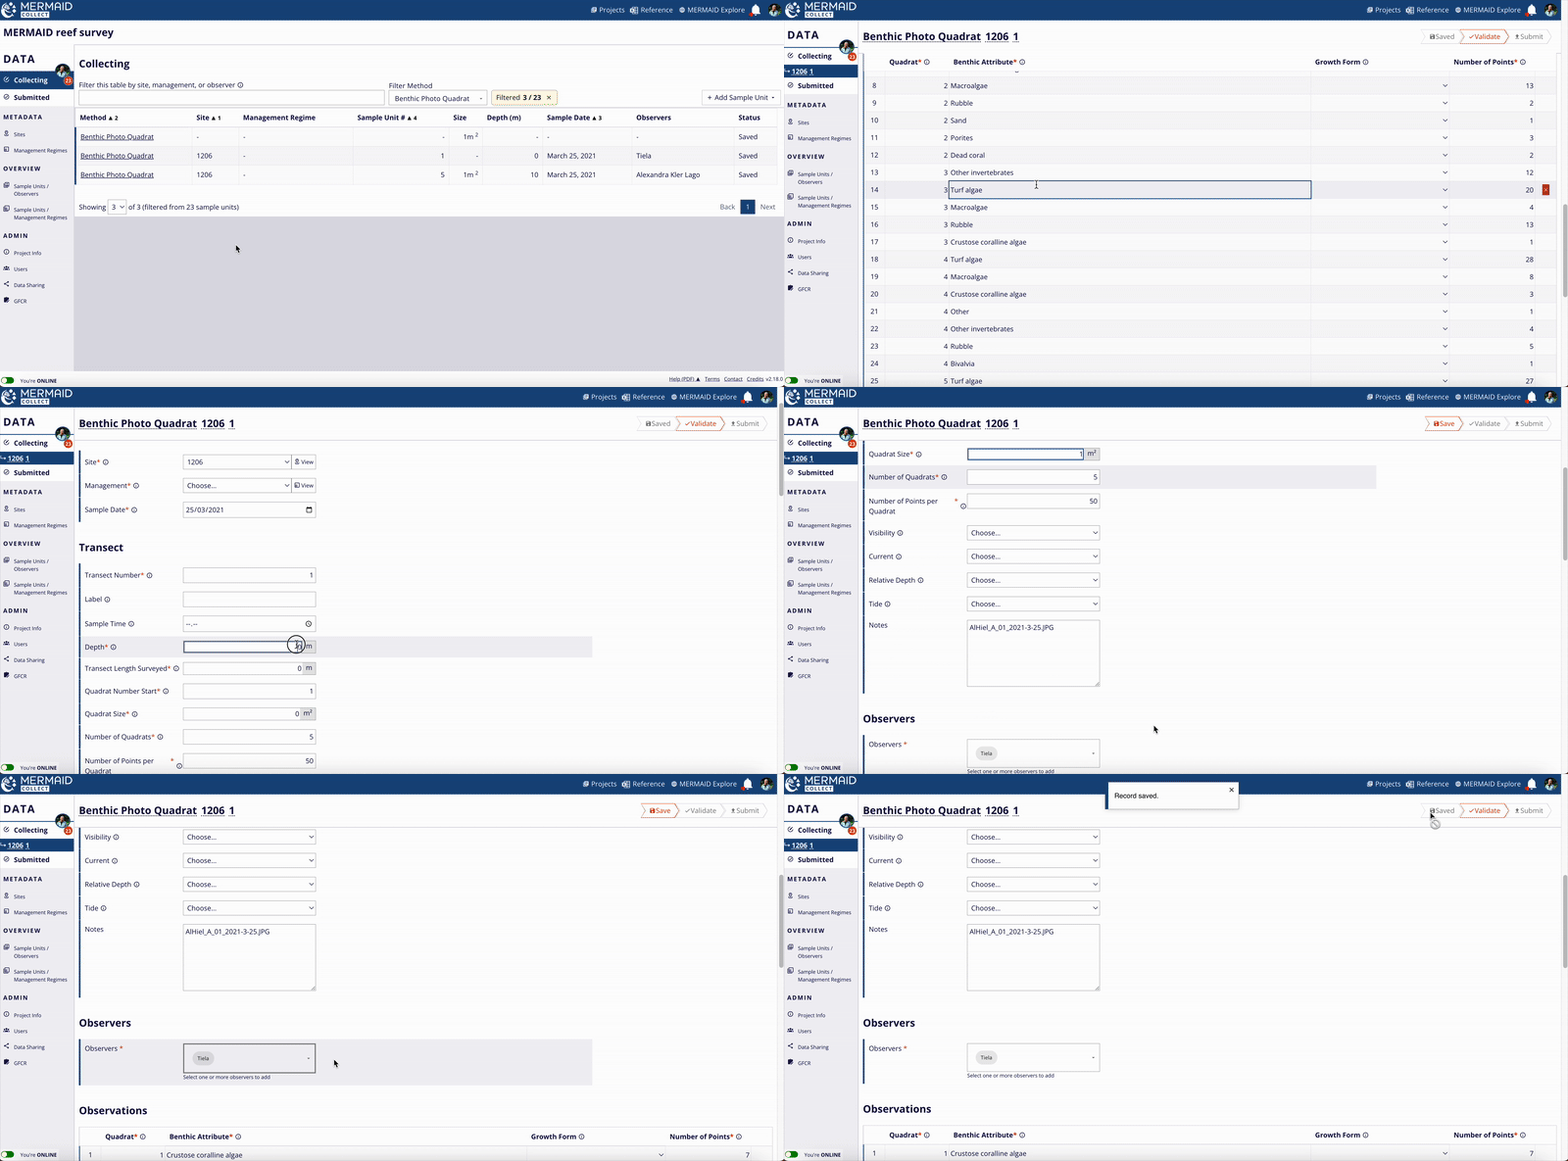
Validate each individual sample unit.
Submit each validated sample unit.
Once submitted, sample units become available to all project’s users in the Submitted page.
Note: Imported data appears under your account in your personal Collecting page of the assigned project. If needed, a project Admin can transfer all sample units to another user via the project’s Users page. Read more about transferring sample units in Editing Data. |
Do you prefer a code-based workflow in R?
For R users, see Importing legacy data into MERMAID.