Try Easy PQT
Photo benthic quadrat data that are annotated using CoralNet can be imported to MERMAID in two ways, i.e., the MERMAID R package mermaidr and Easy PQT. Using the MERMAID R package mermaidr to upload your photo benthic quadrat data to MERMAID requires a good knowledge of R. If you are familiar with R, you can follow the steps in the Upload spreadsheets documentation, which has all the information you need, including the tutorial video and examples.
Another way to import your photo benthic quadrat data is using the Easy PQT app. Easy PQT is a shiny app that supports MERMAID users, especially users unfamiliar with R, who want to import their CoralNet data to MERMAID. It’s straightforward and user-friendly. Similar to using the MERMAID R package mermaidr, your data will appear on your Collecting Page after you import it using Easy PQT. However, you will need to fill in some of the mandatory fields on MERMAID before validating and submitting your data. See the Easy PQT workflow below:

Only an admin of a project can upload data using Easy PQT and make sure that your project is not a test project. A test project will not appear on the Easy PQT list of projects.
Steps to upload your CoralNet exported data using Easy PQT:
Prepare a project in MERMAID with sites, management regimes, organizations, and users added, and data sharing policies set up.
Export your photo benthic quadrat data from CoralNet, including the short codes, ID numbers, and auxiliary fields. MERMAID will use the ID numbers generated from CoralNet to map CoralNet labels to MERMAID benthic attributes, while the short codes will be used to review the mapping result. You will need to set up your auxiliary fields to contain Sites and Management Regimes that correspond to what you have added on MERMAID, as well as Transect numbers. You are also free to rename your auxiliary fields. To export your data with its auxiliary fields, navigate to “Images” in a CoralNet project. Under the “Image Actions”, select “Export Annotations, CSV”, select the label format "Both", and select the optional columns “Image metadata - date and auxiliary fields”, as shown below:

Open Easy PQT and follow the instructions. Once you open the Easy PQT, it will automatically ask you to authenticate yourself. This way, Easy PQT can provide a list of your projects. Only project(s) that are not a test project will be shown on the list.
Select the project to which you want to import your data, then upload your CSV data file. You can click the “browse” button to find the data you want to upload or drag and drop directly to the upload field.
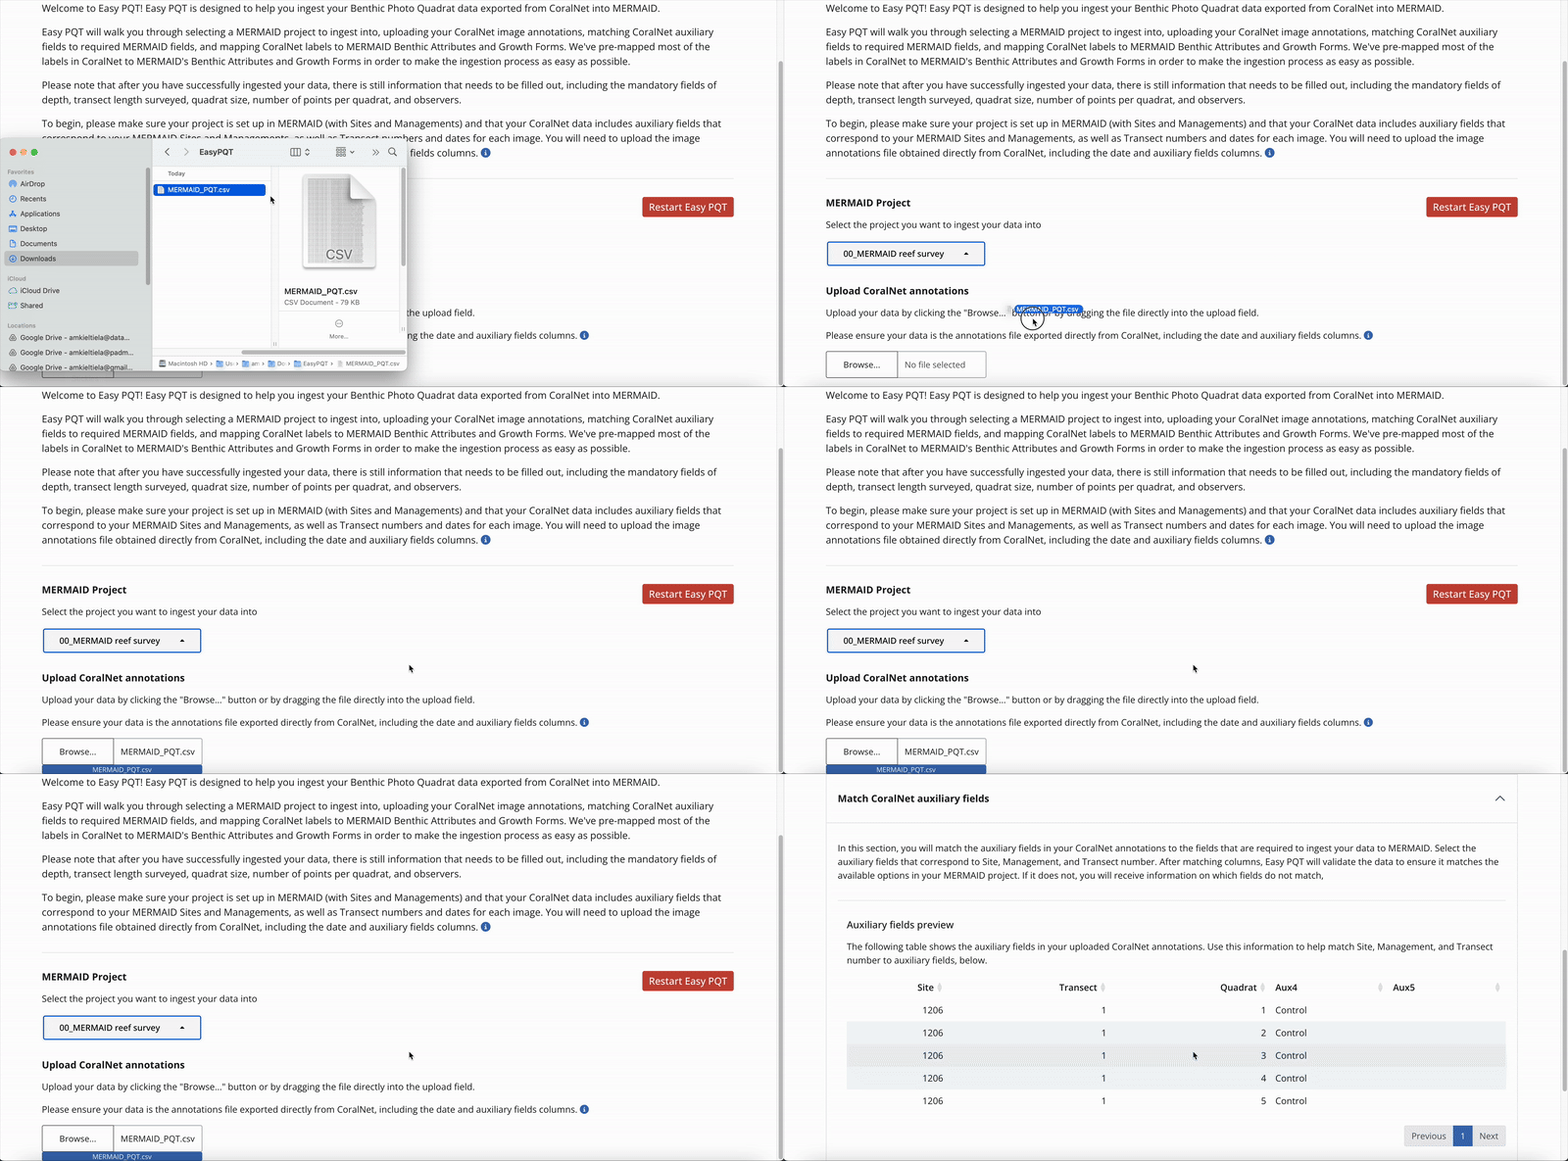
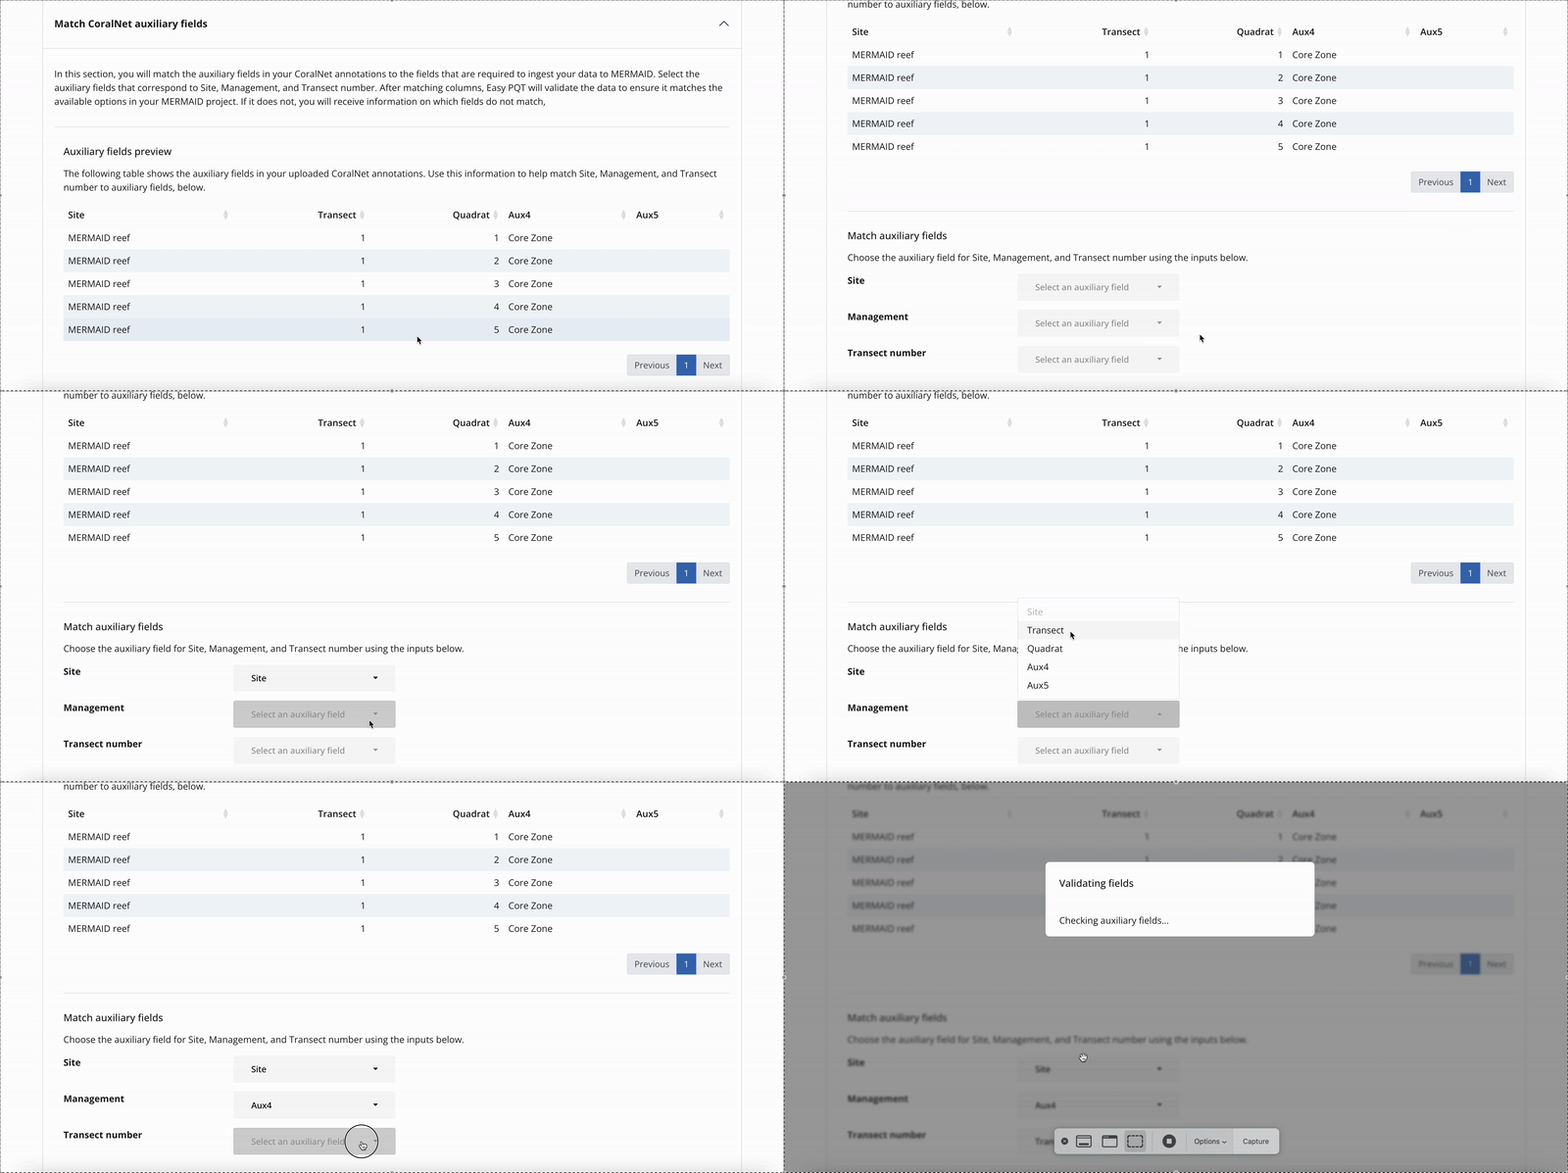
Match your CoralNet auxiliary fields with the MERMAID Site, Management, and Transect number you’ve prepared on the app. Once you’re done matching those three columns, Easy PQT will automatically validate them to see if they match the options in the MERMAID project you’ve prepared. If it does not match, you will receive information on which fields do not match and what the available options are. A button to Restart Easy PQT will also appear for you to click and restart the process after fixing the issue(s).
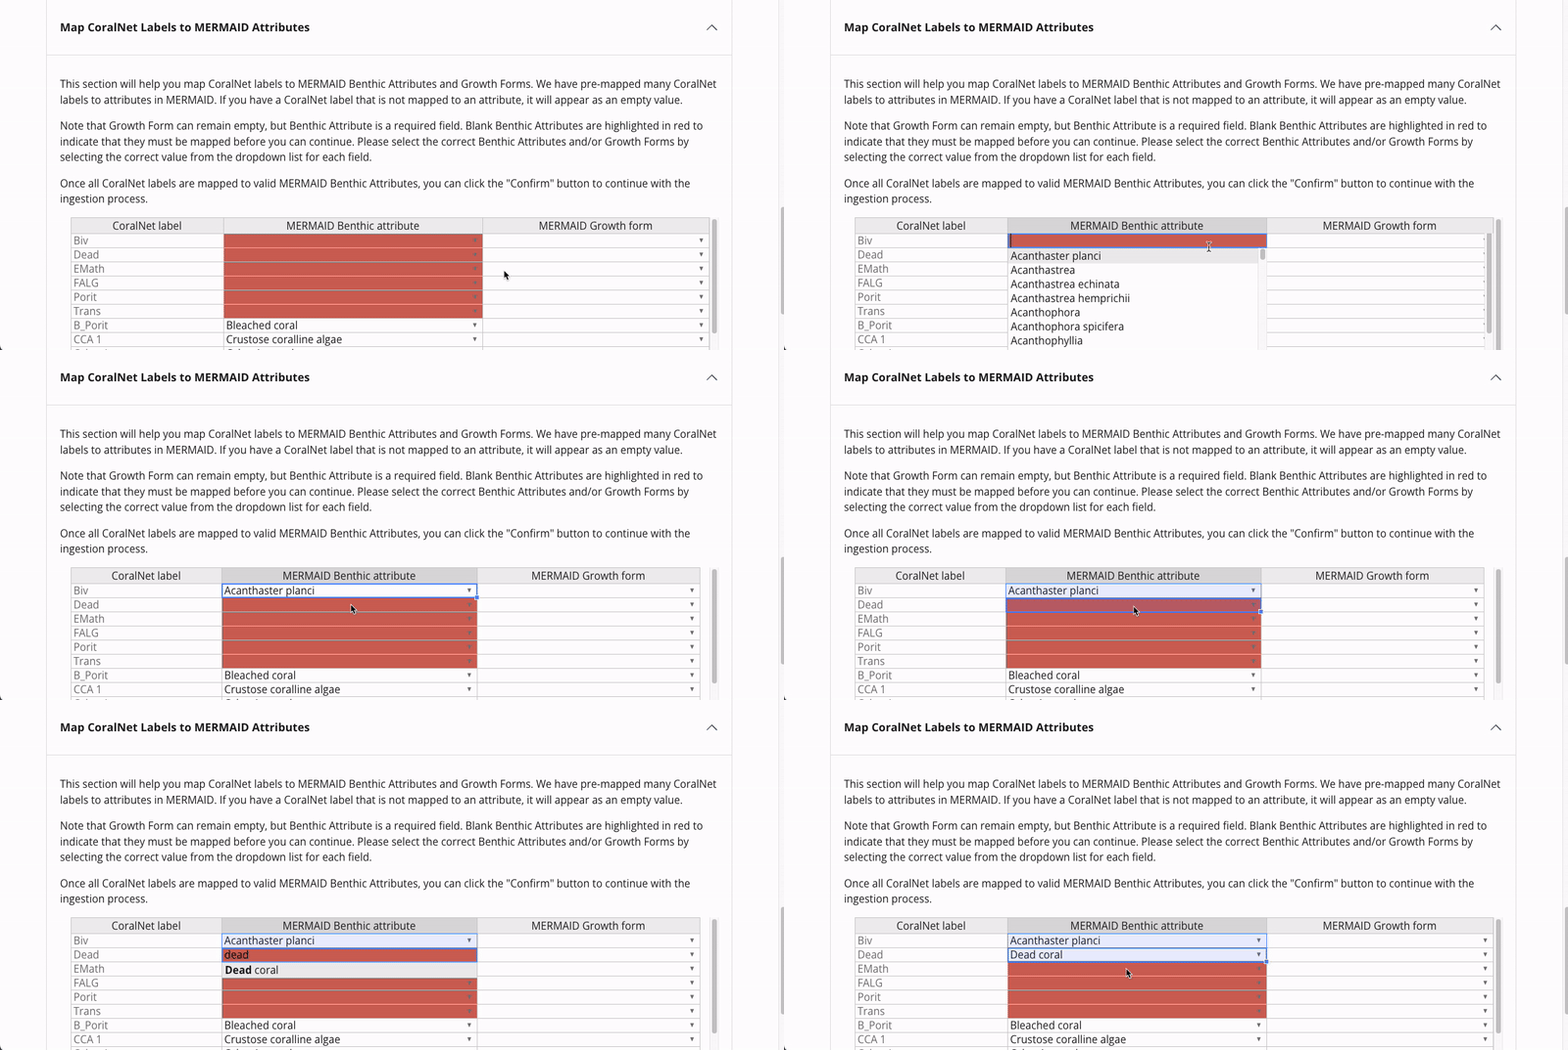
When all your data in the auxiliary fields are validated, Easy PQT will map your CoralNet labels (using the unique ID numbers) to MERMAID attributes. If it’s not available in Easy PQT, then the MERMAID Benthic attribute field will be left blank and colored in red. You need to select the right benthic attributes by clicking on the field directly and start typing or clicking on the arrow on the right to show the dropdown options. Once you’re done filling in the blank fields, click on the “Confirm” button to continue. Easy PQT will reshape your data to match the MERMAID template.
Review your reshaped data, then click the “Continue with ingestion” button to upload your data to MERMAID. If you think the data is incorrect, you can click the “Restart Easy PQT” button to start the process from the beginning or click the “Get help” button to contact us for further assistance. In this section, you can also download the reshaped data in a csv format.
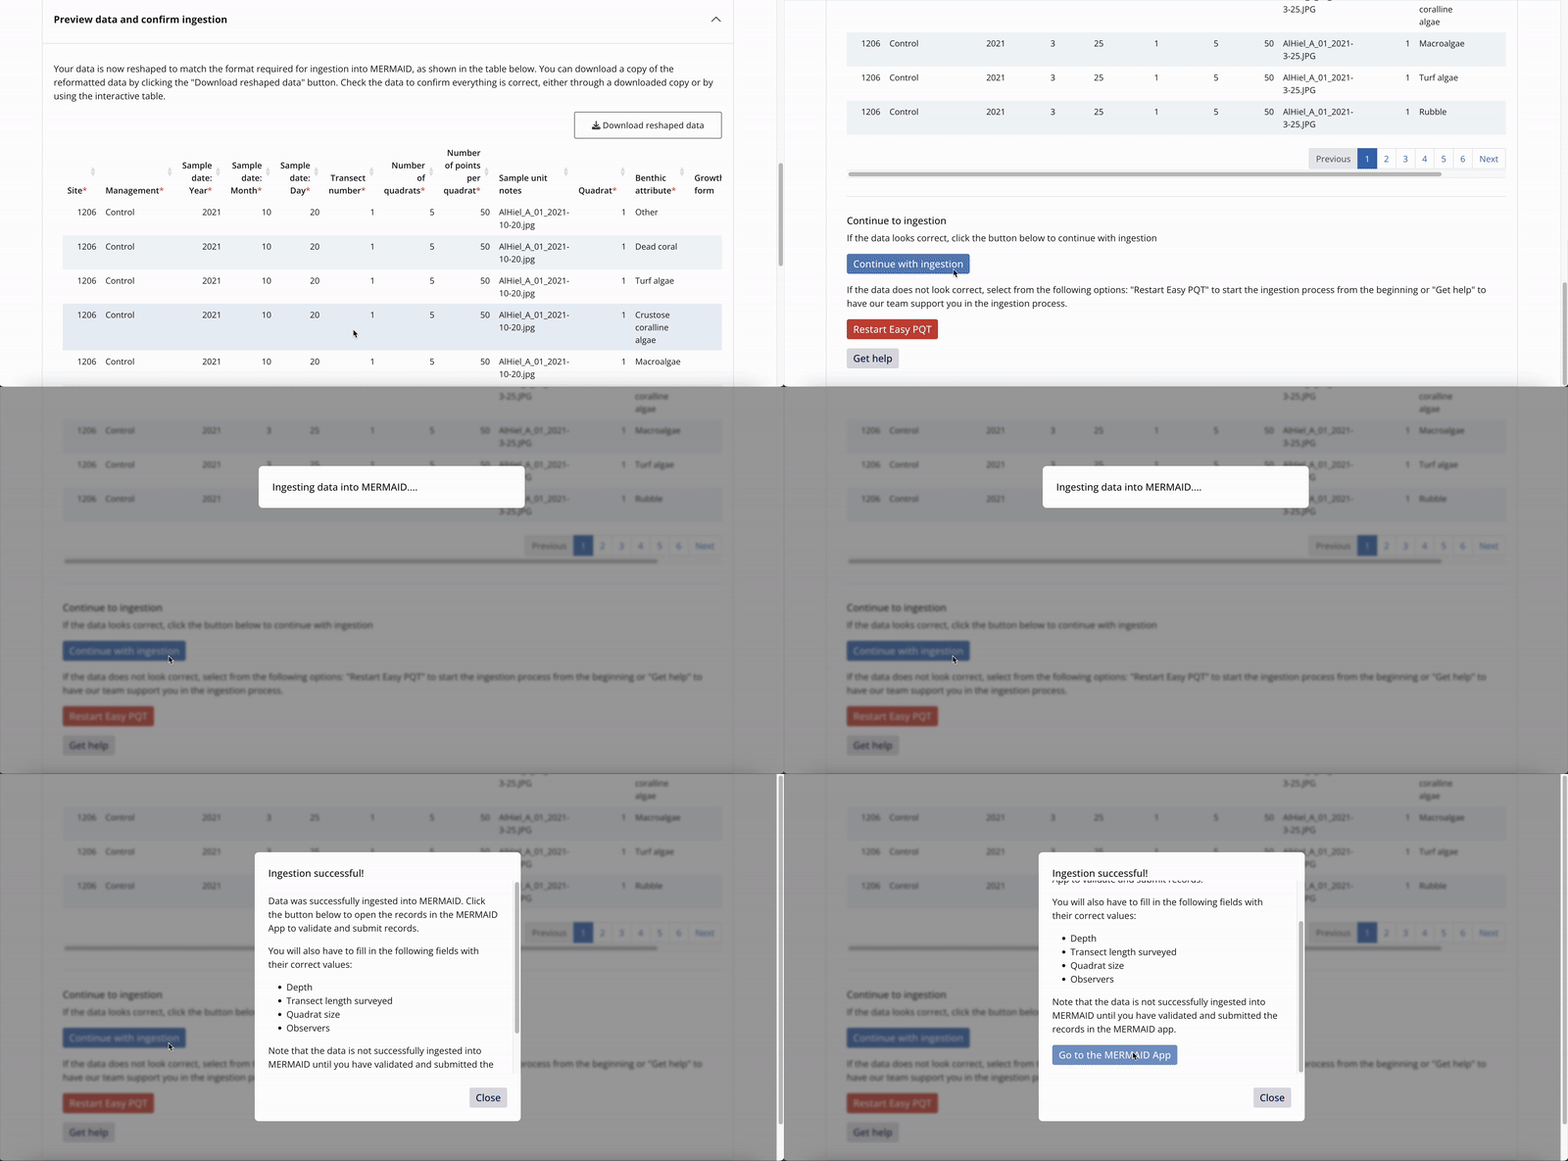
Upload your reshaped data to MERMAID by clicking the “Continue with ingestion” button on the Easy PQT app. Your uploaded data will appear on your Collecting Page.
Head to your Collecting Page in the MERMAID app to fill in the rest of the mandatory fields. After uploading your data, there are still some mandatory fields that you need to fill in. Those mandatory fields include depth, transect length surveyed, and quadrat size. East PQT will automatically assign you (a user that uploads the data) as the observer. Change the observer to the right data collector if you are not the one who collects the data. Once you’re done filling those information, you can validate and submit your transects.
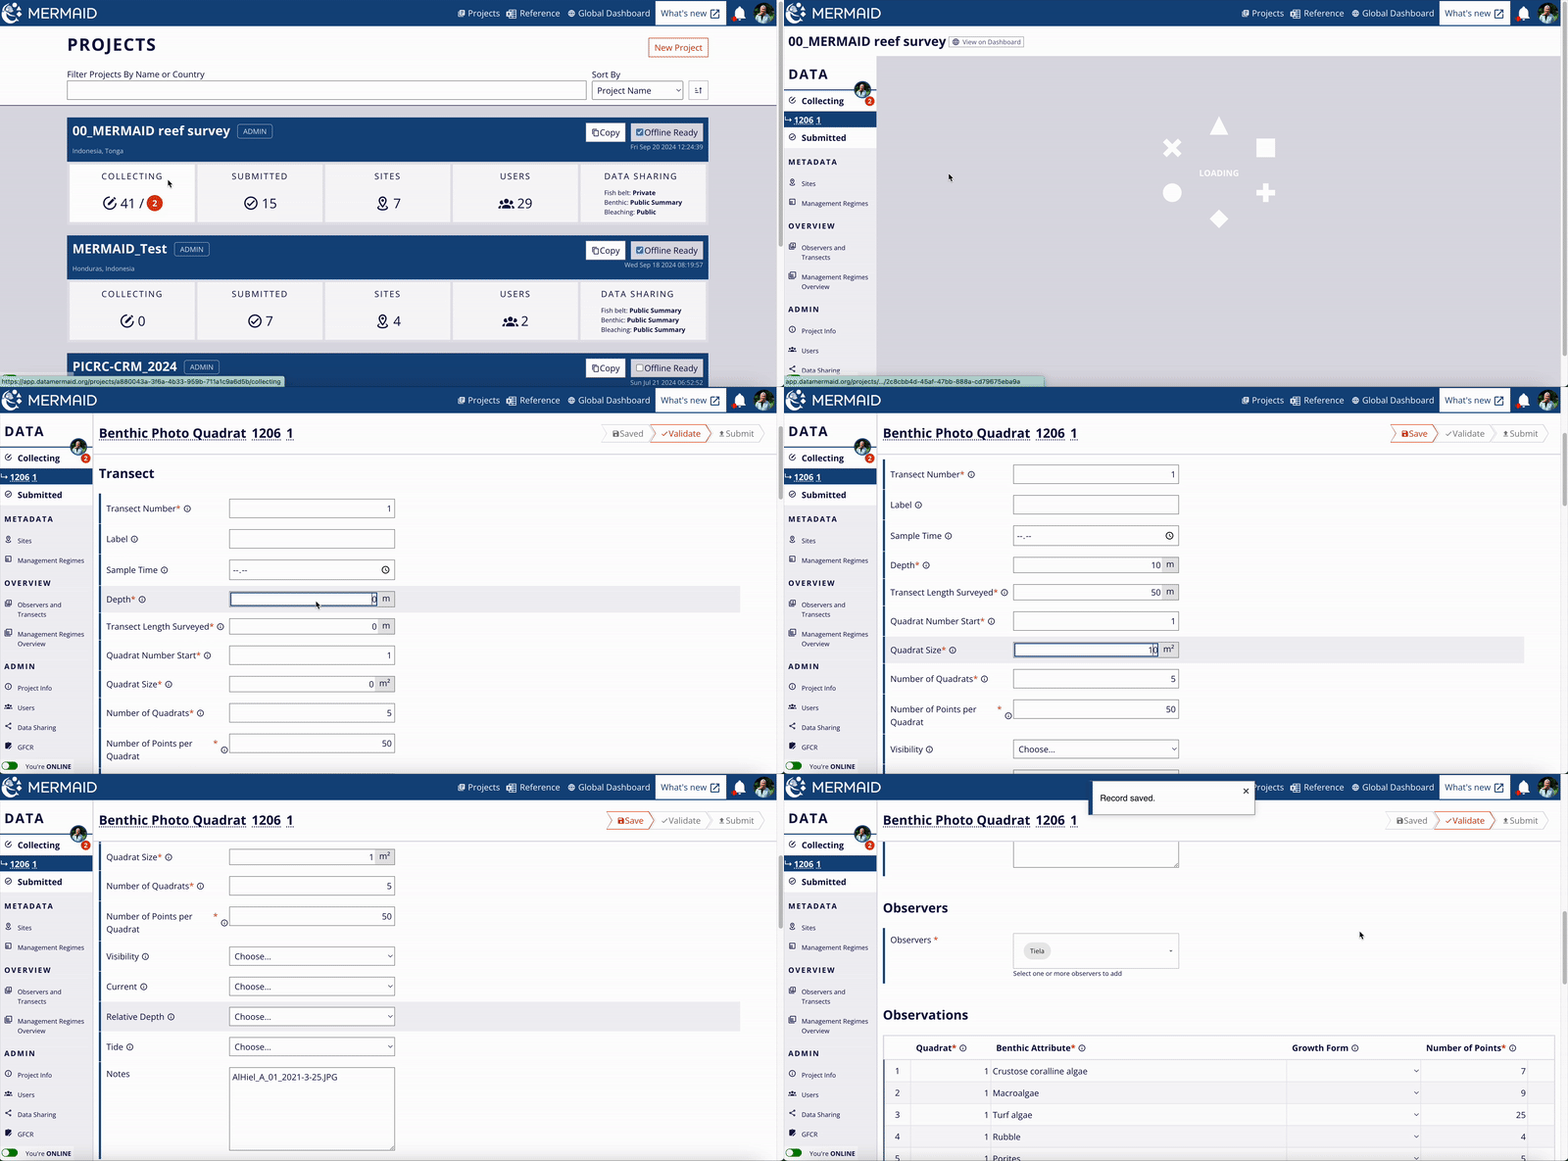
Unsubmitted uploaded transects will appear on the Collecting Page of the users who uploaded the data using Easy PQT. You can transfer these unsubmitted sample units to another user through the project’s User Page. Only an admin of a project can perform this action.